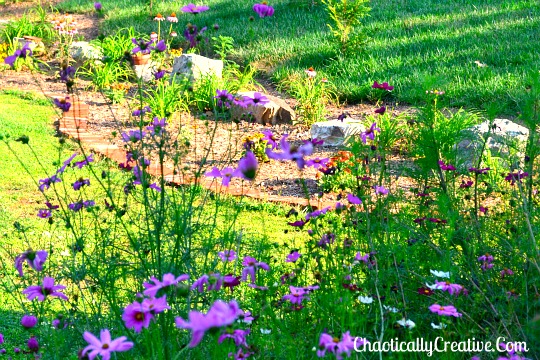
 When we moved into our house in late July of 2010, the interior had been mostly renovated. The yard as mentioned in Digging My Landscape, was in very bad shape. We have owned 3 houses and this has been the greatest Landscape Blood, Sweat,Tears & Itching challenge of all.
It literally involved blood, sweat, tears and lots of itching. While there are projects to be done inside, to make the house our own, it was a priority to whip this yard into shape. Planting areas needed to be defined, tilled and sculpted and I wanted to get plants in the ground so they could grow and mature while working on other things. Also, landscaping is seasonal while interior projects can be done year round.
Here’s a brief over view of what we faced. There were large rocks scattered randomly, 3 huge mounds of dirt from digging out the foundation and replacing piers, gargantuan stumps, piles of rotting wood and old bricks. The big issue we faced was a row of old ivy covered trees that were planted some 50 years ago on the property line. They were eaten up with carpenter ants, over hanging the house and getting ready to fall. In fact, one did fall right after we moved in. We knew this would have to be addressed right away.
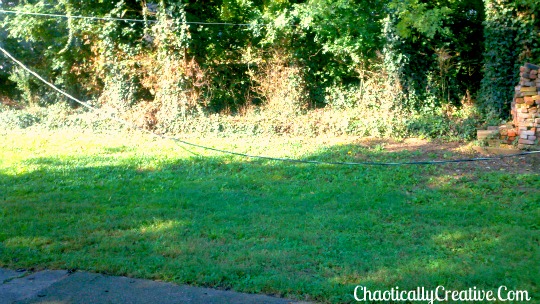 This picture was taken the day the tree fell and took down the power line. It shows a small section of that row of trees. The ivy vines had taken over and you wouldn’t believe what all we found on that bank, buried in the dirt.
It was a smorgasbord of rocks, brick, cinder-blocks, trash, railroad ties, rotting timbers, poison ivy, snakes and broken glass. To top it all off, it was mosquito alley. It was completely over-whelming. We truly did not know where to start. So we just started picking away layer by layer. We eventually uncovered enough to see that it was a very steep bank and had a really neat old terracotta drain damaged by huge tree roots.
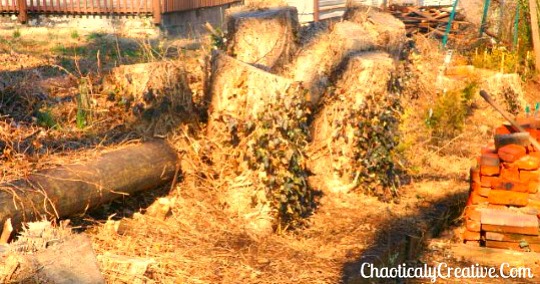 It was quickly determined that the trees had to go. This was a disappointing conclusion to me, because I loved the ambiance and privacy they created, but common sense prevailed and they came down.
As it turns out they were old Hack-berry trees and extremely hard to cut and deal with. What was left was an ugly mess of stumps that made me feel I had moved from the Shire into Mordor. It was so bad that I actually cried. Here’s some tips on tree removal that I wished I had known.
- Proper equipment for the job and enough manpower
- Knowledge and experience
- Debris and stump removal
- The right price
We hired someone to remove these trees that live quite a distance away and did this type of work on the side. His price was very reasonable, but as it turns out, he had a difficult time getting a crew together and had to rent some of the equipment needed. The job was much bigger than anticipated and just didn’t work out the way we had planned.
I had never paid much attention to the skill of tree cutting until I was faced with the task. I am by no means an expert, but I know now that there are different methods of doing this according to experience level and equipment. I watched a professional arborist cut a huge tree across the street. It was a sight to see as he maneuvered through that tree like a primate. Expertly cutting it limb by limb and lowering them to the ground with a rope.
The other task is removal of the debris. You do not want to leave wood to rot in your yard. This can cause insect problems such as termites and carpenter ants. We ended up with a mountain of debris and had the city remove it for several hundred dollars. This was an expense that we had not planned on.
Stump removal is not an easy job, especially if it is a large hard stump. We investigated renting a stump grinder and doing it ourselves and I am sooooo glad we did not. I called several landscapers to come out and take a look at grading the yard, thinking that they might be able to take the stumps out with a bob cat. One of them referred me to a man who had this awesome grinding machine that took out 13 huge stumps and their roots like they were butter! He told us it would have taken us weeks to grind those stumps ourselves and he did it in a few hours. I took pictures of Benny and his stump grinder, but cannot locate them. I found this picture of a similar machine on the internet.
Prices on tree removal can vary wildly due to time of year and weather conditions such as a storm. I had a quote for $4500.00 to cut down 3 trees during late summer. The guy came back in the winter and offered to do it for $1500.00 because firewood was needed. I have heard that some will do it just for the wood. It is good to get lots of quotes and ask friends and neighbors if they can recommend someone reliable.
Prepare yourself for a change in scenery. It is much more dramatic that you think. I remember right after having the trees cut, it was so bright in our kitchen that we had to wear sunglasses to eat breakfast. Not kidding! I went out that weekend to get blinds and window treatments!
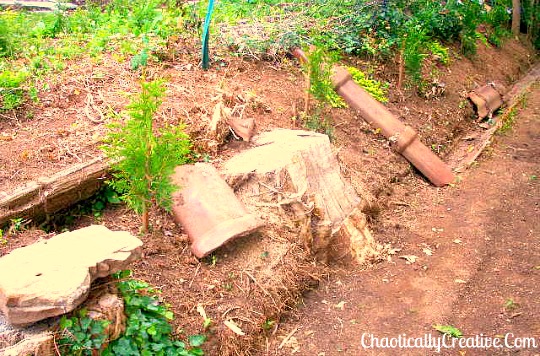 This picture was taken before the stumps were ground. You can see a little section of the drainage tile. My plan was to let the little arborvitae trees grow over the stumps. Looking back at this picture, I realize how silly that was. I am just so thankful for Benny and his stump grinder. One of the happiest days of my life! I bought the young trees late in the season at Walmart for only $1.00 a piece. I re-potted them in large buckets and kept them alive for a year while we worked on this project.
So, the stumps are ground and all is well? Not quite.
After stump grinding you are left with piles of sawdust/wood chips. You can also be left with large holes in your yard where the stump used to be. Now it is time for bringing in fill dirt and grading. It took us months to find someone local to do this job. I happened to spy a company doing this type of work at one of my favorite seasonal nurseries, liked what I saw and ask the owner for their name. This is a process that is best done in the fall when it is dry, so once I hired the company, it was a waiting game for the right time. The time finally came, they did an awesome job for a fair price and finally our yard was graded and re-seeded. They also moved all the large rocks around for me with their bob cat. Now at last after a year, I can do what I love best. Make the yard look pretty!
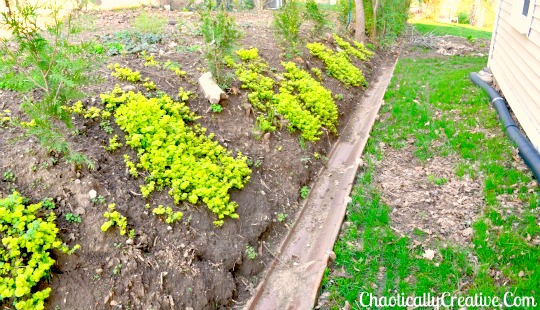 The landscapers who came out recommended many solutions for this bank area that slopes toward the house. One of which was a retaining wall. This would involve digging down and placing a french drain in the ground, putting in the wall and back filling. This would be the absolute best thing to do here, however, it was more than $5,000. What we opted to do for the time being was to plant Creeping Jenny, an evergreen ground cover. This shot was taken in the early spring of this year.
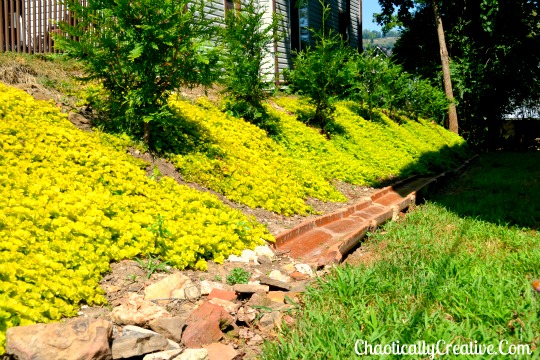 Just a few months later, the ground cover has almost completely covered the area and keeps the soil from washing into the repaired terracotta tile. Creeping Jenny mounds as well as spreads so it fills in dips and valleys and the bright lime green color just looks beautiful. The foundation on this side of the house is over 100 years old and is solid stone. Since putting gutters on the house and removing the trees, this wall has remained dry. The evergreen trees are growing and will soon provide a privacy screen. Now for a few before and after pictures.
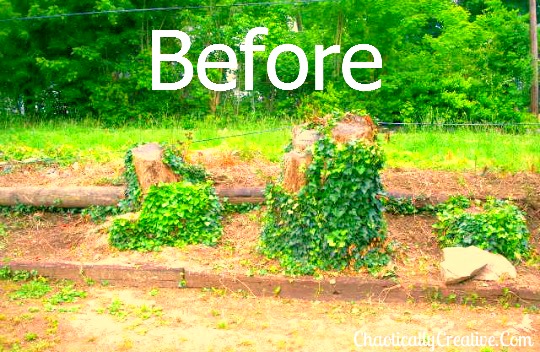 This is another section of that row of trees after being cut with the stumps remaining.
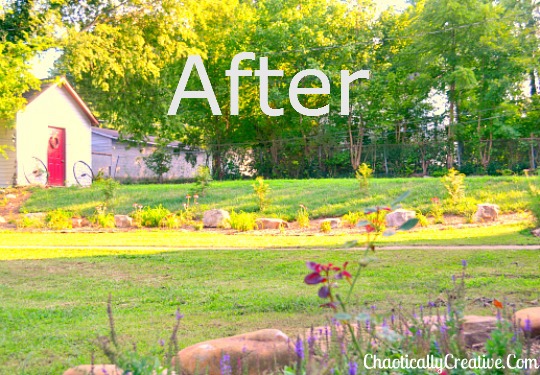 After the stumps were ground, landscape/excavators softened the bank by giving it a gentle slope. Grass was planted and Arborvitae trees were staggered along the bank. Then using our Mantis Tiller, the flower garden was shaped and tilled. We had enough old bricks to line the area. Take a look at another “before” picture…
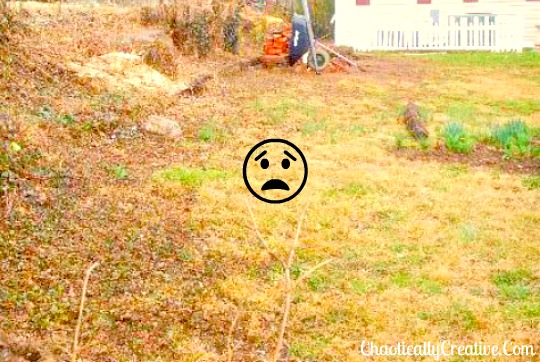 Believe it or not, this was after several months of hard itchy work. You can also see the stack of old bricks that were moved three times before they found a home lining the landscape areas. Now for the after picture…
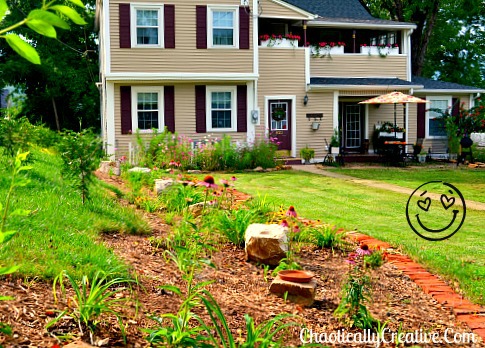 Plantings include; Day Lily, Purple Cone Flower, and Blacked Eyed Susan. The rocks were scattered all over the yard and I had the landscapers place them in this area. Terracotta pots were placed on several rocks for feeding wildlife. I woke up one morning to find squirrels sitting on each of the stones enjoying breakfast. Here’s yet another before picture…
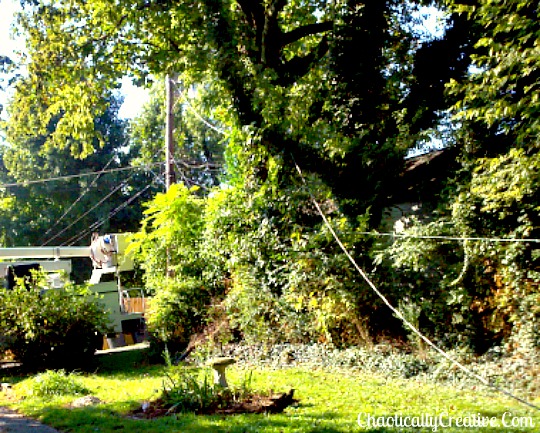 Take a gander at this mess. This the last section of that row of trees in the back. The area was cleaned up and we had all that “mulch” from the stump grinding moved to this area.
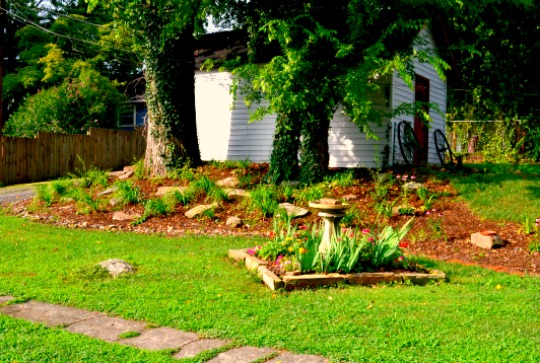 Can you believe this is even the same area? Eventually these trees will need to be cut down as well so we did not want to put a lot of money into this area. Day Lilies and Daffodils were transplanted from other areas of the yard and large flat rocks were placed on top of the mulch. We also added some Forsythia plants that will really fill in this area and look great in the spring.
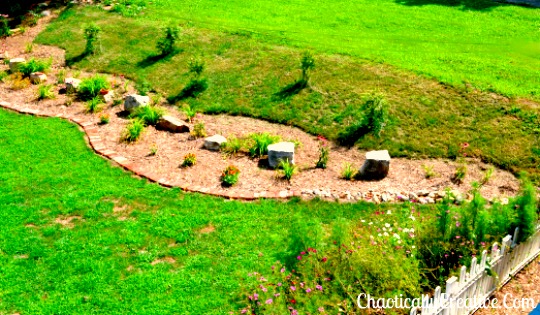 Whew, so glad this is done and we can enjoy adding more perennials and nurturing them to maturity. I can’t wait to see this in a year or so. In the end, it was worth the struggle and it feels so good to come home.
Hard work pays off. Looks great.
Thanks Beth, yes it does pay off eventually. It’s good to take pictures though so that you can see just how far you have come.
Denise, it’s lovely! Your hard work certainly shows. What a change from when you first moved in. I remember what the back yard looked like, and what it looks like now – WOW!
Thanks Sheri, We’ve come along way baby!