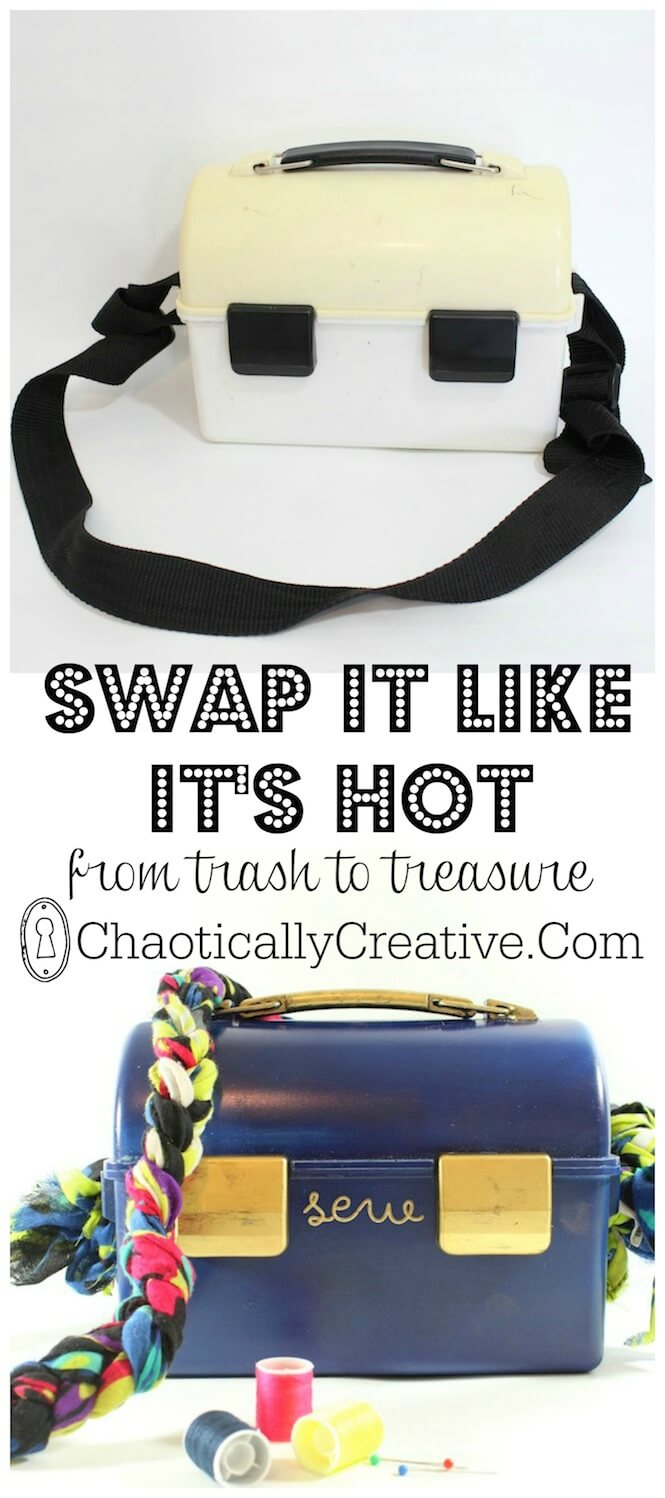
You thought this post was just going to be a really awesome post about sewing kit organization, right? Well don’t worry, it is but it’s also so much more. I’ve collaborated with 40 other bloggers! Yes, 40 bloggers who all went thrift shopping and then sent each other thrift store finds. With a budget of $10 we set out to send each other some of the most lack luster items to see how we could bring the back to life. So have fun all week exploring the #swapitlikeitshot and make sure you are following us on Instagram as I share all the other bloggers projects. ![]()
Now on to the challenge… meet Allison from Two Thirty Five Designs she’s my super talented and hilarious friend from Texas. She sent me some thrift finds all the way from lone-star state. Out of the several she sent I choose to recover the most hideous of the 3. And here it is………………………………..

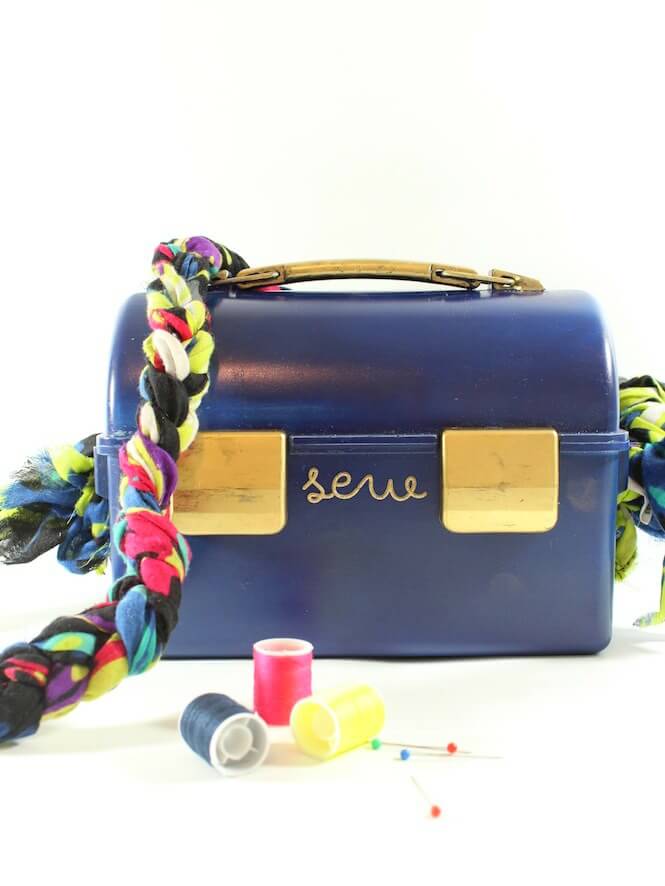
I think this is a plastic lunch box but honestly I don’t know. Whatever it is I knew it had great potential and could be used for so many things. I first thought I could use it as a camera case… that didn’t work because it was too small. Then I thought I could use it as a First Aid Kit but my husband just purchased a cute little first aid kit from Target. I had to keep thinking!!!
 And then a little light bulb went off. I was in great need of a small sewing kit with all of the essentials. I use to have one but it’s been torn a part to the point I had no more essentials. In fact I couldn’t even find a needle the other day.
I love my new sewing kit and it was super easy to create. Even if you can’t find this exact “lunch box” you could remake any plastic container using this process.
Sewing Kit Organization
- Find a cheap plastic container
- Clean it really well
- Spray paint it
- Add details like a new strap and stickers
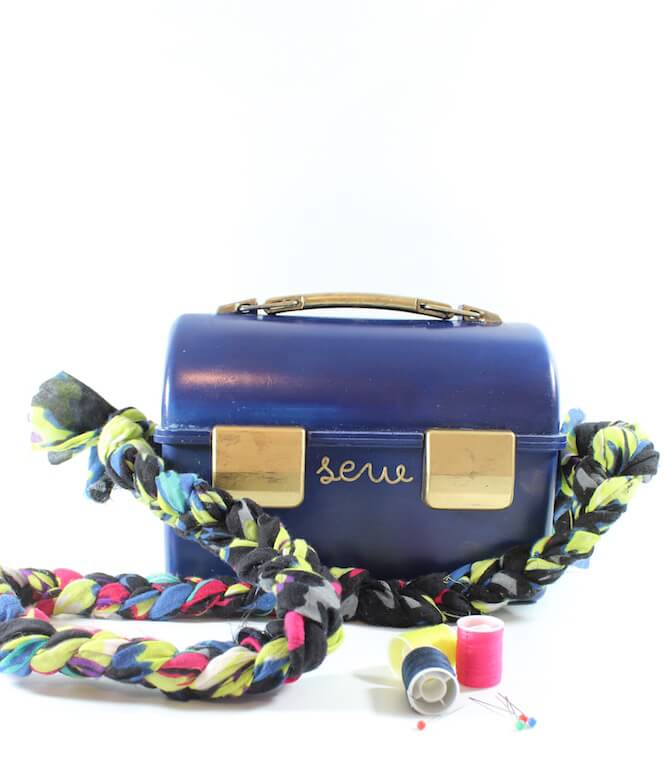 Isn’t the new strap so much more fun? It’s an old scarf that I cut in to 3 sections and braided. It was free and easy!
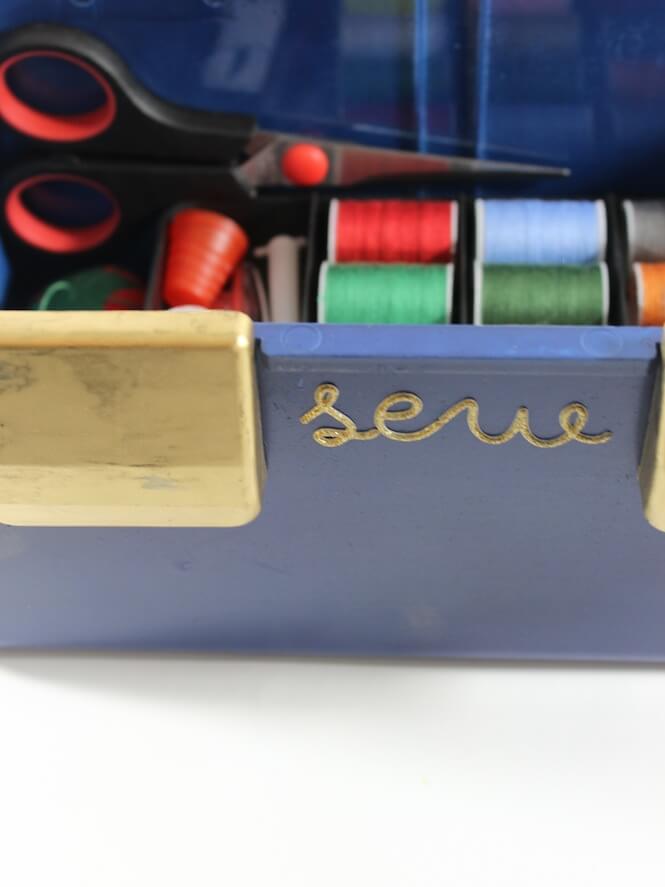


I think the details really helped give this little box a new look. I found some puffy letter stickers in gold and used them to label the box. The other gold details were created by simply using a gold paint pen.
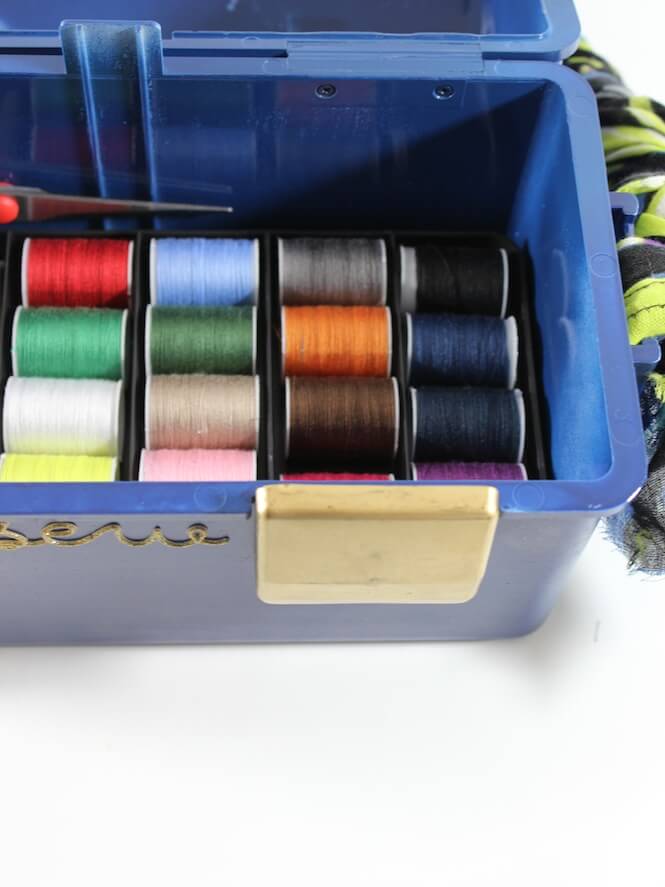
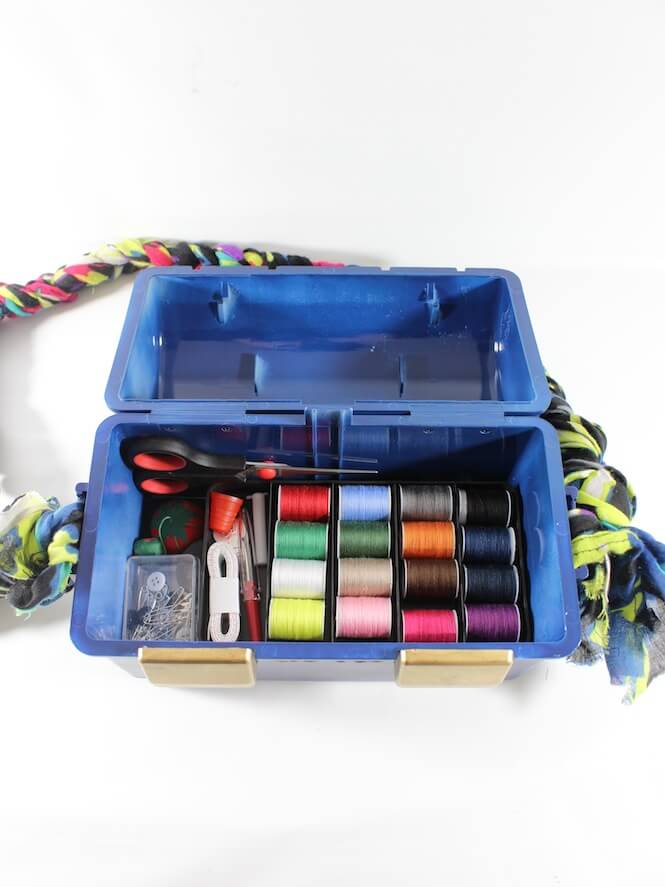
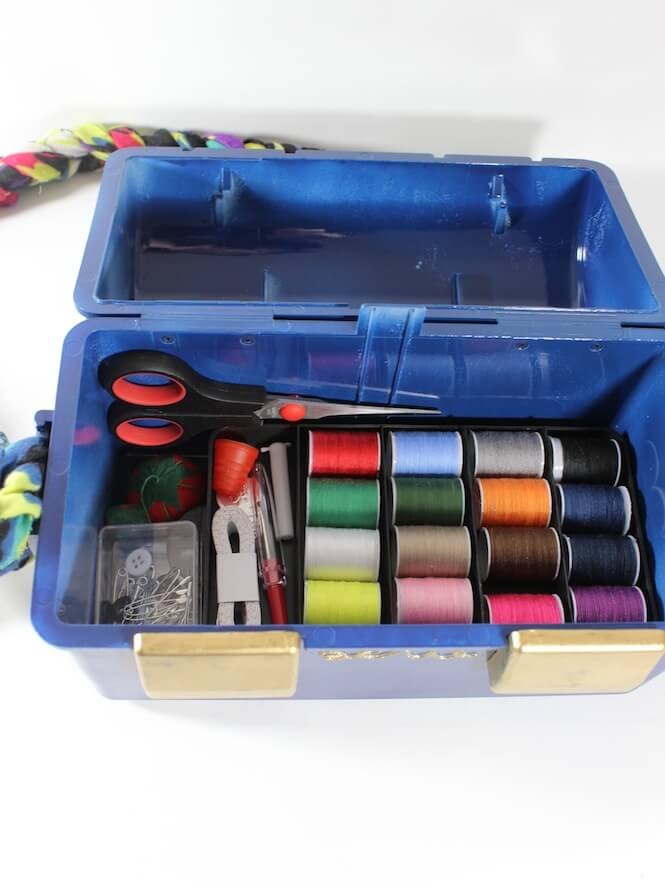
Lastly, I filled the box with a pre-made sewing kit I purchased at Walgreens. It had everything I needed and it fit perfectly within the box. Want some more unique organizing ideas? Check out this awesome post on how to organize your jewelry.
Now it’s time to see more awesome swaps! I sent Jessica from Decor Adventures some interesting things and I can ‘t wait to see what she created with them. Head over to Decor Adventures now and check out her thrift store makeovers!
Here’s a list of all the bloggers for the Monday Swap feel free to check them out too!
Tune in all week to see the crazy items this talented group of bloggers has been making over! Search the hashtag #swapitlikeitshot on social media to follow along with all the fun or check out our Pinterest Board.
MONDAY
That’s My Letter / DIY On the Cheap / Run To Radiance / The Gathered Home
Two Thirty Five Designs / Chaotically Creative / Decor Adventures / Homemade By Carmona
TUESDAY
Thoughts From Alice / Reinvented / Confessions Of A Serial Do-It-Yourselfer / Restoration Redoux
Always Never Done / I Am a Homemaker / Black and White Obsession / Windgate Lane
WEDNESDAY
Town and Country Living / brepurposed / The Charming Farmer / 58 Water Street
Designer Trapped In A Lawyer’s Body / Year of Serendipity / White House Black Shutters / Desert Domicile
THURSDAY
Two Purple Couches / Like A Saturday / Finding Silver Pennies / Artsy Chicks Rule
Something to Be Found / Shades of Blue Interiors / Simple Designing / Our Southern Home
FRIDAY
Evey’s Creations / Dragonfly and Lilypads / Weekend Craft / Ciburbanity
A Designer At Home / Polished Habitat / Blue i Style / Addicted 2 DIY

Adorable! I would never have thought the “before” could turn out so awesome – you had great vision and creativity! Love the blue and gold together and that woven strap is so cute!
Great job! I think it looks like an old tackle/fishing box!
umm. Can I have that back now? Please and Thank you.
As always, amazing job my friend 🙂
My sewing “kit” is a basket that barely fits a pair of scissors… :/ Needless to say, this is MUCH better! Thanks for joining the #swap fun!! xx
Loving the blue and gold combination and so useful now. Smart work.
This is such a smart idea! And I love how you dressed it up with a new strap and those gold puffy letters!
Seriously so cute! I am going to keep an eye out for one of those now, maybe it will inspire me to learn to sew? 😛
I love a project that is as useful as it is cute!
Wow, you really transformed that! Perfect for a little sewing kit/box! 🙂
xo
Nancy
You got one heck of a hard item Lesley! Such a cute makeover!
Thanks so much Shanna
This is seriously awesome. The colors, the repurpose, just awesome.
Thanks so much!
How adorable … and useful too! Love the color you chose for your new sewing kit!
Oh so cute! Now I must add “find an old lunch box to turn in to a sewing kit” to my list! 🙂
Such a sweet transformation! My favorite thing to find at yard sales + estate sales are sewing essentials (so much less expensive than purchasing them individually at the craft store). Over time the haul gets a bit overwhelming.
One time I scored an entire sewing box (for a mere $7.50) complete with a 70’s orange and white decoupage. Needless to say… I’m in desperate need of a new one too! Next thrift store search, it’s game on! Thanks for the inspiration!
I love it! And it’s portable so that’s fantastic!
Thanks so much Corinna!
This is so cute! I need to do something similar for my sewing storage. It’s all thrown in a drawer right now.
Mine was all over the place too! Not anymore!
Such a great idea! I especially love how you did the strap. You ladies are all so creative.
thanks so much Michelle!