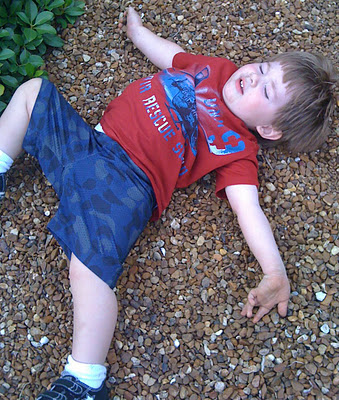
When we moved into our home the first thing I noticed very quickly was the endless amount of pea gravel surrounding the landscaping. The second thing that drew my attention was how much Jude loved to throw the gravel onto the sidewalk and roll around in it and well you get the point. Pea gravel is not the easiest to clean up after being distributed all over a sidewalk. It can be very slippery. On top of everything else, it is also not very attractive. In fact we had a tree planted and the landscaper pointed out that it looked like driveway gravel. Umm, thanks guy, now that totally solidified my desire to get rid of it.
After living with the landscaping for the first year, my husband and I decided that we really wanted mulch in place of the pea gravel. To save money we decided to remove and repurpose the pea gravel ourselves. The rest of the landscaping will be left to the professionals. Not because we can’t do it ourselves, but only because we may die after we are done scooping this gravel. As much as it pains me to pay someone else to do something we are capable of, it’s worth it not to leave our kids orphans for the sake of a better looking yard.
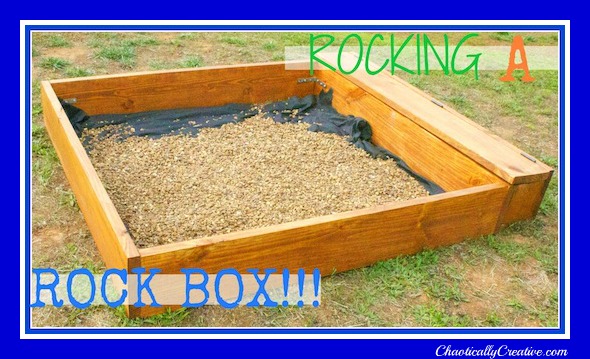
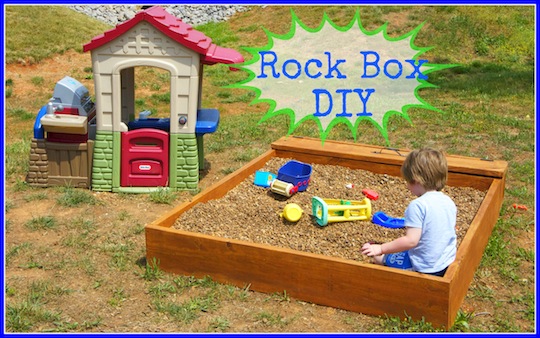
We decided the best way to repurpose the pea gravel that Jude loves oh so much was to build him a “rock” box instead of just ditching it all. Ironically, the week before I built it, Sherri, from Young House Love blogged about their switch to Rocks from Sand and her reasoning for this choice. There are some concerns that certain sands are dangerous for inhalation, so please do your research before moving forward if you decide to purchase sand. You can read Sherri’s post to learn more about this subject. Lucky for us we already had rocks and were moving on ahead with the stuff we already had. Once we used all we could we gave the rest to some neighbors, score for everyone!
There are lots of designs for great sandboxes out there. Young House Love has some great inspirational links and an awesome design of their own. Sherri started out with her’s as a sandbox, so the cover was very important to keep cats and critters out. Knowing that ours would be a rock box from the start I did not have a plan for a cover. I have three cats of my own and they have no interest in the rocks so we opted for no cover. Instead, I wanted to add a toy box that would also act as a bench.
Materials for Sand or Rock Box DIY
- 4 pieces of 10 foot un-treated framing lumber $8.72 a piece
- Quart of Olympic Deck Stain $15.29
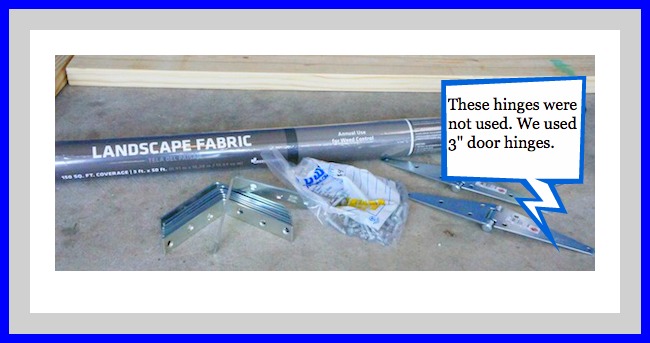
- Eight 5″ corner braces $2.98 a piece
- Landscape fabric $9.98
- 58 1/4 inch galvanized lag screws .47 a piece
- Three 3 inch hinges
- 1 lb 3 inch deck screws $8.47 a box
- 1 gate pull
 How to Rock A Rock box of Your Own!
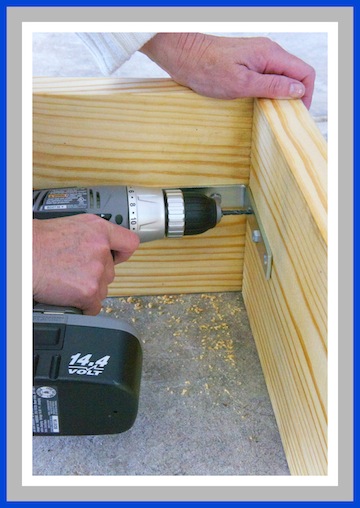
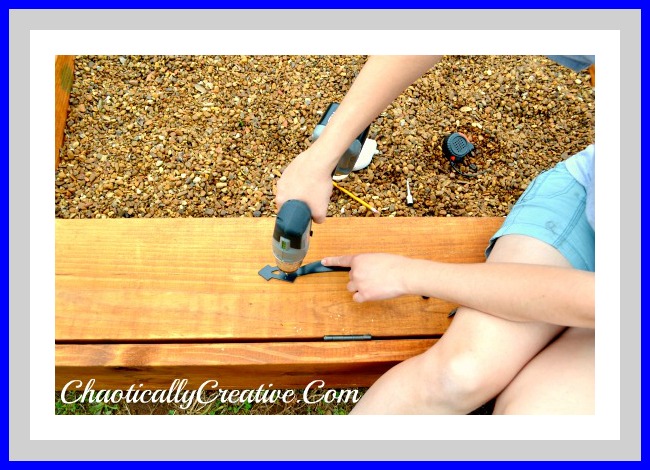
1.) Using 4 of the 5″ corner braces and 1/4 inch galvanized lag screws attach boards 1,2,3 and 5 together from the inside corners as shown in picture. First make sure you pre-drill holes and then use the galvanized screws.
2) From the outside corners use three 3″ inch deck screws to reinforce your corners. Basically, when you are looking at this picture you would use 3 more screws on the board where Mom’s hand is touching. Drill 3 down the outside where those two boards meet for extra reinforcement.
4) Now you have your four sides connected. and have built a basic sandbox/rockbox. You can stop now or you can add the toy box.
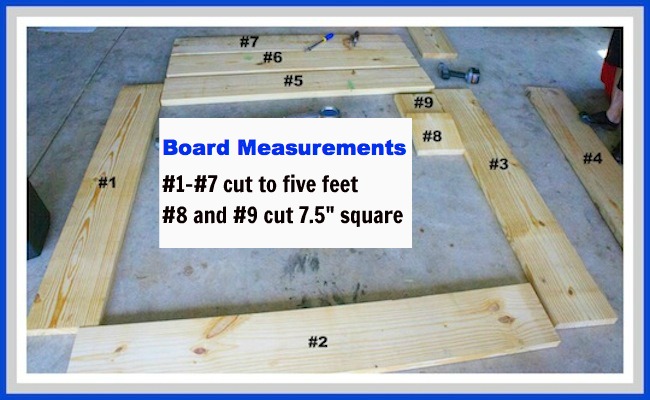
5) Just to clarify: Toy box pieces: #5 is the back of the box, but will act as the front of the toy box, #6 is the bottom of the toy box, #7 is the back of the toy box, #8 & 9 are the sides of the toy box and #4 is the lid to the toy box.
6) Take #7 and using 3 inch deck screws attach sides #8 and #9 to the top of board #7. Not to the sides of board #7. You still want #7 to measure out 5 feet long.
7) Attach board #6 (the bottom) to #7, #8 and #9. Now you have almost all of the toy box together minus the front because remember the front is part of the rock box.
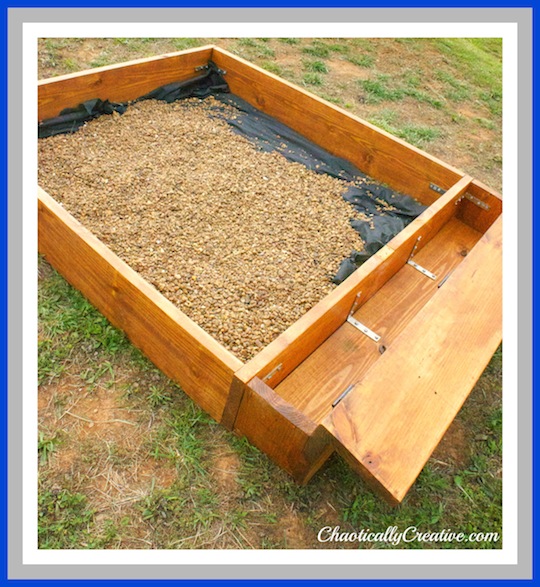
8. Slide your toy box towards the rock box .Place your brackets in the corners and two on the bottom of the toy box. Mark holes, pre-drill and then attach the brackets with galvanized screws.
9.) I waited to stain the entire box after it was all put together. I only needed about half a quart of deck stain and a paint brush.
10.) We added three black hinges and a big gate pull for the handle. We have one last thing to add for safety and that’s a child safety toy chest hinge, this will prevent any little fingers from being slammed.
11.) Move your box to the location, it took 3 of us, but boy this box was sturdy. We then placed the landscaping fabric inside of the box and began filling it with the pea gravel. I am not sure of how much pea gravel we used but it sure seemed like a lot. Sherri from Young House Love used about 20 bags, you can read her post here.
Overall we are very pleased with the rock box, however this project had one big failure that I will be completely honest about. COST!!! I expected that the cost would be way lower considering that we already had all of the pea gravel. We spent about $150.oo for all of the materials.
I honestly believe that you can build this for less however the route we took allowed us to build a very sturdy box. I admit that I did not do my research as this was a spur of the moment project for a quick solution to our rock problem.
You may be able to build this much cheaper but here are some things to keep in mind when building for children and for building outside.
- avoid pre-treated woods
- avoid materials that will rust
- avoid sharp materials
- make sure screws and nails do not protrude
- seal all wood
- if you use sand make sure it is safe for inhalation for young children
- sand rough surfaces that could potentially cause splinters
- always add safety hinges or hooks to support lids
- add covers for sandboxes to prevent cats from using it as a liter box
- sand and rocks boxes are normally suggested for children older than two and under direct adult supervision (young children who put things in their mouth may not be ready for a rock or sand box)
Good luck and please use the comment section for questions and any other ideas or suggestions that you have for building your own “Rock” box. If you have any other safety tips please share as well. We would love to hear them!
I’ve never heard of a rock box. I took me forever to find ‘clean’ sand. I love this idea!!
Shantalle, I’m glad you like the idea. When I worked in childcare we started making the switch from sand to anything we could think of like rice, paper, etc. (to our indoor sand table that is) The sand was so dusty.
Nice looking rockbox. I did a similar thing but on a smaller scale. I babysit a couple days a week and like Jude, the kids wanted to play in my pea gravel walk. I don’t like the walk but didn’t want them to throw the gravel outside of the walkway boundaries. One day, I decided to give them a small rockbox to play in on my screen porch. I used an under the bed plastic box (the top is an added bonus)and a couple of bags of smooth river rocks from the craft store. I threw in a few sea shells collected on past vacations and a few toys. They have so much fun loading the rocks in toy dump trucks or just transferring them from one place to another. It’s clean, safe fun and I can watch them from the comfort of my porch swing. The box slides under a table when not being used.
Pat, The under-the-bed plastic boxes are awesome for sensory tables, great idea. They are small and compact and like you said have lids. I’m so glad they are enjoying the rock box as well. We’ve been having fun finding the little tiny seashells in ours lately. Lesley