The project that will go down in history as “The Office” is finally coming together. Just love it when all the hard work you put in finally starts paying off! Now that we have Stripped, Fixed Cracks, Sanded, Painted and Stenciled, it is time for the Office Furniture Refurbish.
Each section of the room was completed as I finished the Feather Stenciled Walls, mainly because I needed to get everything back in it place and calm the chaos. The first section (after the closet) was the filing cabinet with the Vintage Owl Lamp corner. The next one was the Office Furniture Section. As I stenciled the walls, I was also giving the furniture coats of paint, sanding, staining and wiping.
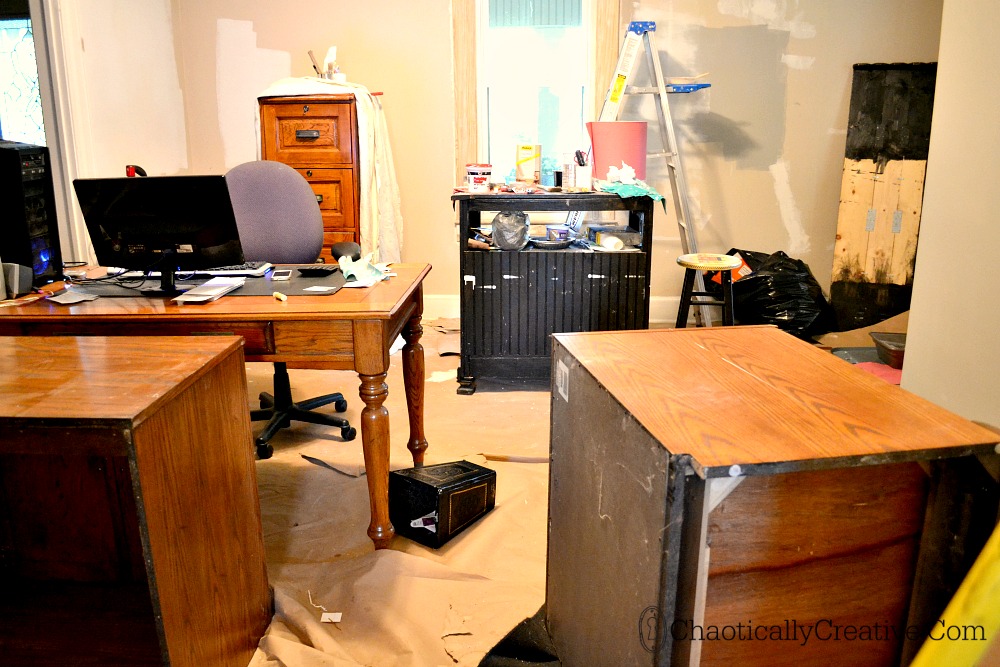
Did I ever show you this? The sectional office furniture unit had been dismantled and scattered all over the room and painting the walls had started. I was hating life during this period and really wondering if I would ever get done.
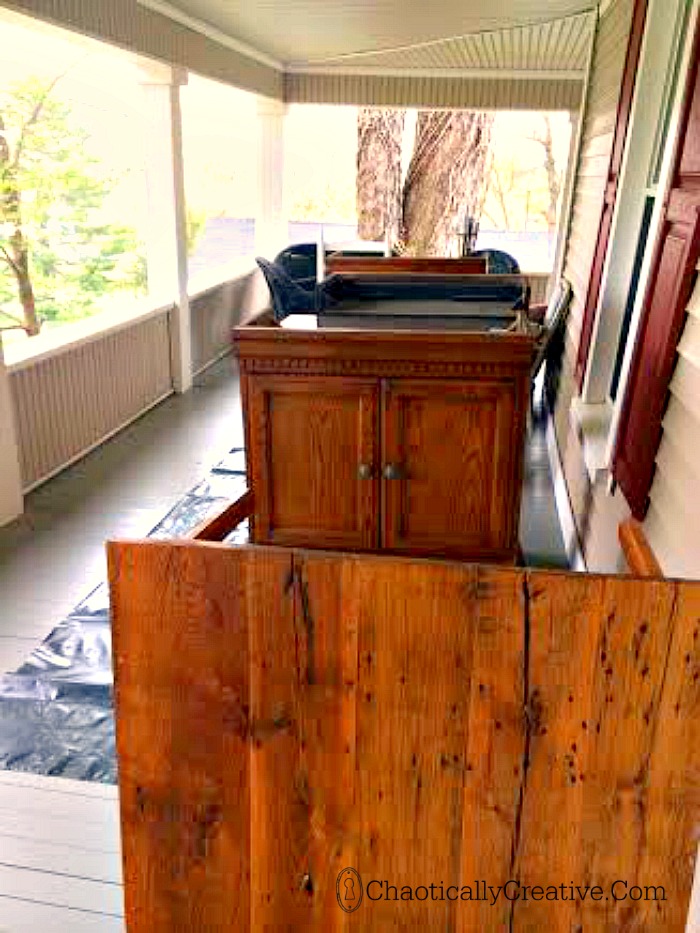
The top cabinets of the office furniture “sectional” had to go out on the porch and they stayed there for a really long time.
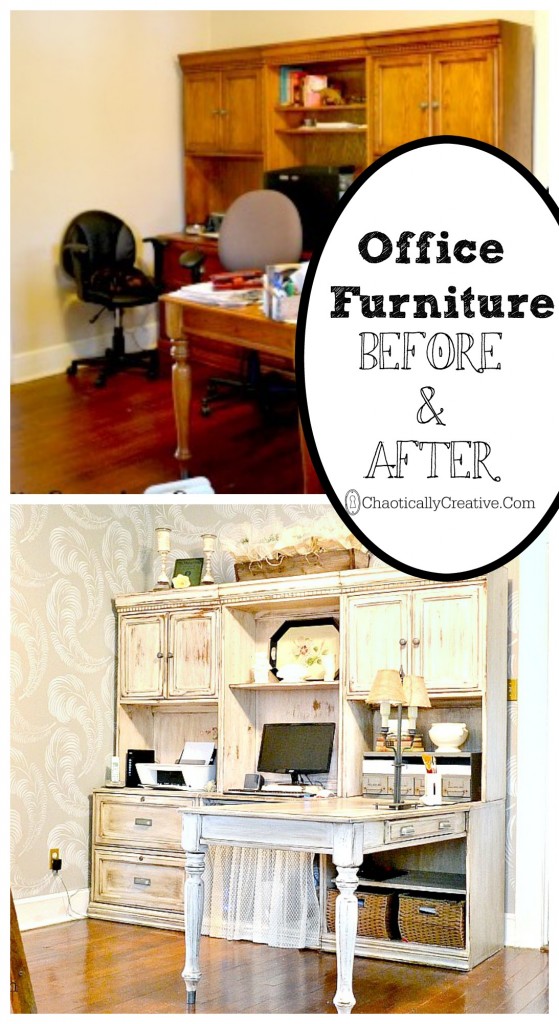
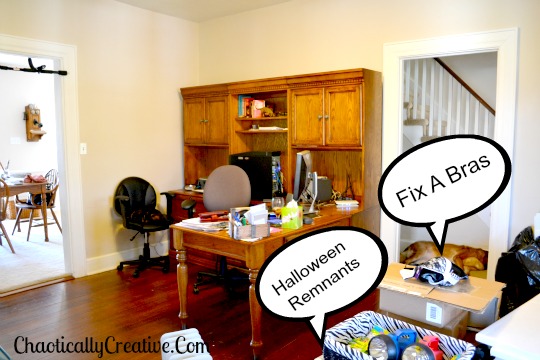
Here is what the office looked like before the project began and the furniture dismantled . This furniture has been with us for about 10 years. It has seen hours years of homework, work projects, video game battles and has the wear and tear to prove it.
Every room makeover just has to have a little furniture transformation right? This room is no exception…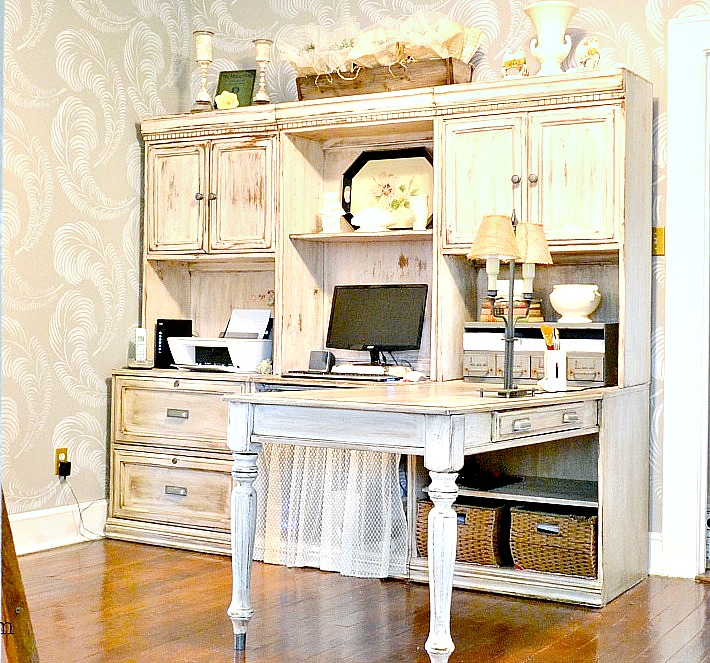
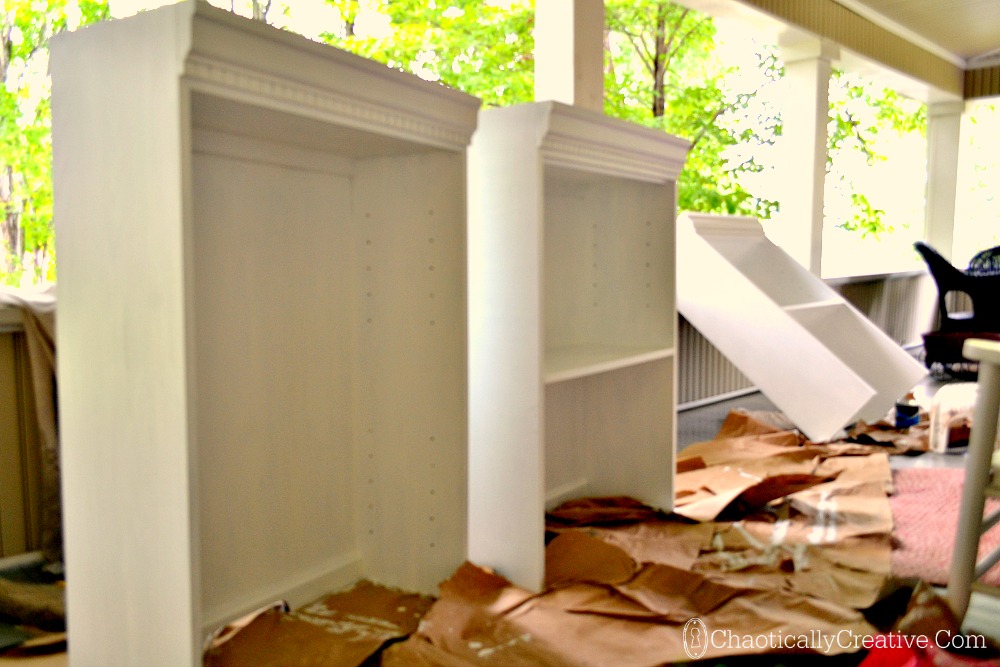
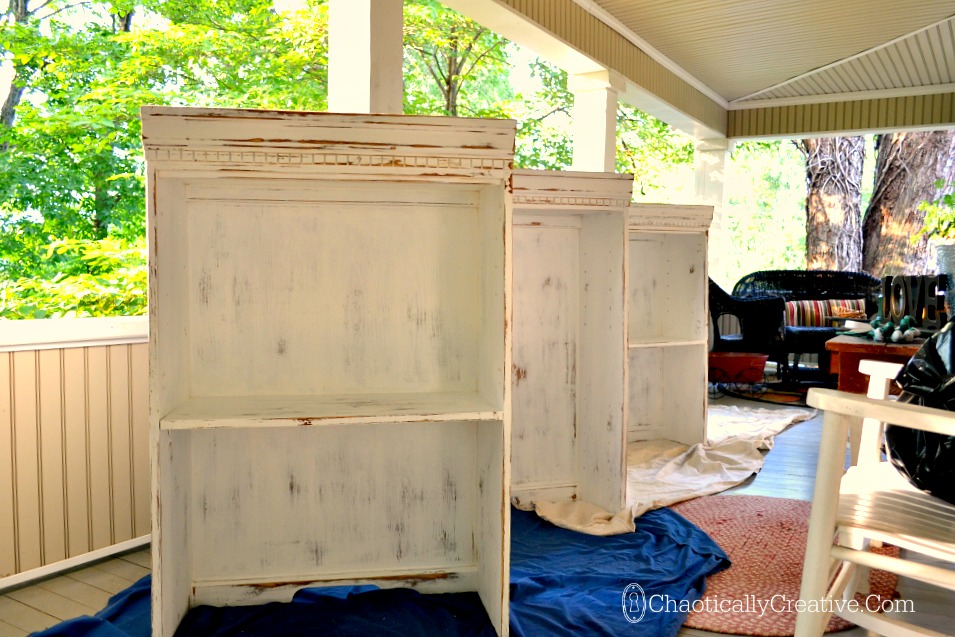
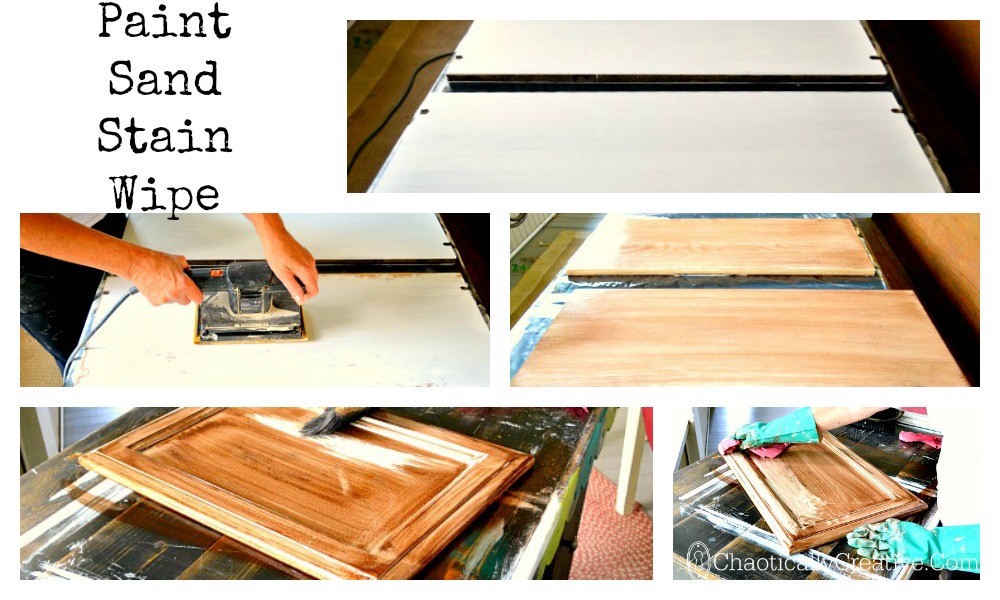
Can you believe the difference a little paint, stain and elbow grease makes? Don’t throw out your stuff because you want a change! You can enjoy years and years of service out of furniture by refurbishing. It really is a simple four step process starting with a coat of flat latex paint with primer. Since we are distressing the paint job does not have to be perfect, but avoid drips. Drips don’t distress well.
You could skip the staining and leave as is after sanding. For this particular project, I did apply stain. Here are the steps.
- PAINT AND ALLOW TO COMPLETELY DRY
- SAND WITH AN SANDER FOR A HEAVY DISTRESSED FINISH. HAND SAND FOR LESS DISTRESSING
- APPLY A COAT OF STAIN. DO NOT ALLOW TO DRY! LET IT SOAK IN AND WIPE WHEN IT STARTS TO THICKEN AND STICK.
- WIPE. TO LIGHTEN, APPLY A LITTLE PAINT THINNER TO YOUR CLOTH. TO DARKEN, REAPPLY STAIN. AFTER THE STAIN HAS DRIED AND CURED, YOU HAVE TRANSFORMED YOUR FURNITURE!
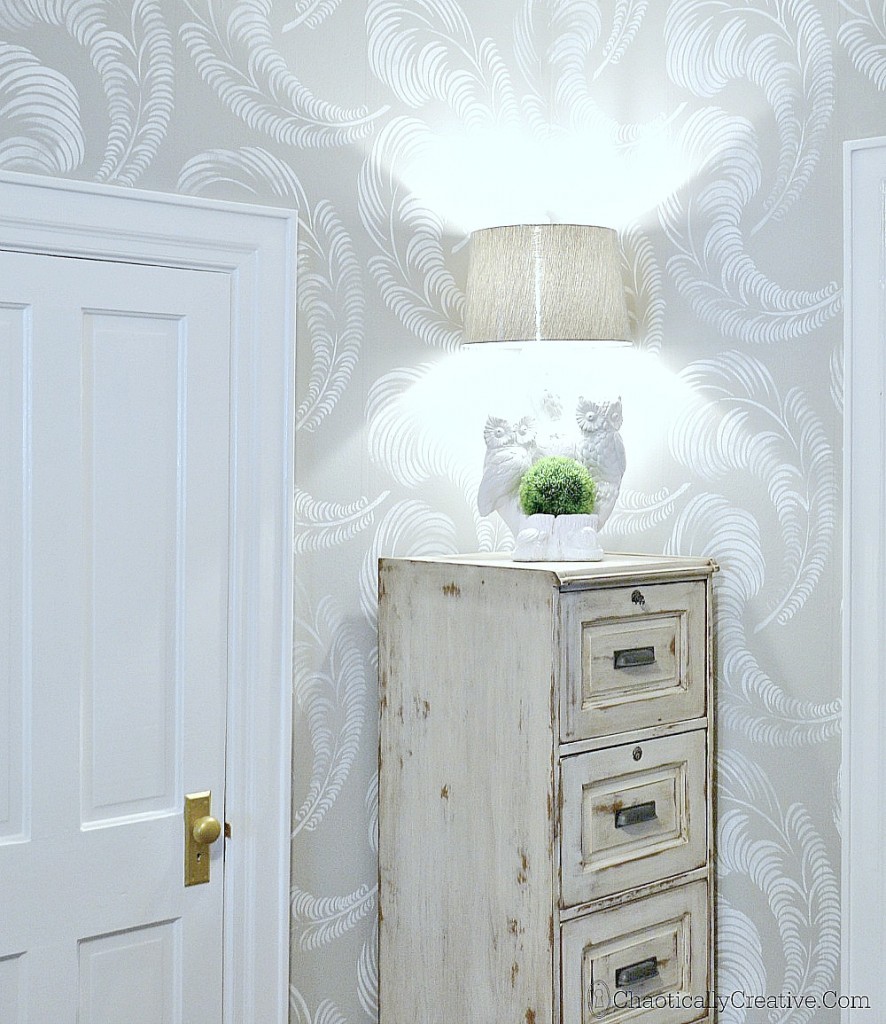 Love the way this filing cabinet turned out!
Everyone in the family agrees that this Office Furniture Refurbish was a GREAT improvement!
So ready to enjoy another 10 years with this functional and updated furniture.
Stay tuned for my upcoming post on styling with Thrift Store Finds and see the music sheet bouquet featured above.
I am so tired of stained oak. Our old house could handle the dark heavy stuff — I am wanting to paint -paint-paint! The hubby gets the deer in headlights look when I talk about painting furniture. His answer – It’s so permanent. Yep that’s what I want!! Your office looks great!
please tell me how you did the filing cabinet… I love it…
Hey Judy, I painted it white, sanded with a hand sander then applied some dark walnut stain and wiped off. Let me know if you have any other questions.
Was it a wooden cabinet or metal, I am getting a metal four drawer and would love to get this look on it.
It is wood Judy. Not sure how you would do metal.
omg i love the furniture! and the wallpaper, where did you get that i’m obsessed with feathers!!!! Beautiful job!!!
It’s a stencil. We have a post all about it
Fab shabby chic-ness! That looks amazing! You guys did an awesome job!
Found you through IHeart Organizing’s monthly linky – and I’m so not regretting it! Subbing right now 🙂
Yep if you are wondering where that “guys” came from… ask my fingers cuz I have no clue lol.. -.-
Fantastic! I’ve been wanting to do this to a large pine computer center/armoir but have been hesitating. This has given me confidence to do it. Love the feather stencils too, by the way
How fun Stacey. Send us some pictures when you do it!
Love this! What brand/color of white did you use? And did you seal this with anything?
Also did you use a brush or paint sprayer?
Hi Jessie, it was an Ace Hardware latex enamel in a bright white,but any brand would work. No sealing, just the stain and I used a brush. The furniture was originally a golden oak color which also makes a difference in how the finish looks because I sand down to the wood in spots. Hope this helps. Let me know if you have any questions.