The long awaited moment is here. I can finally reveal my paper bag flooring. I will be giving a super brief tutorial. But if you want major details I highly suggest heading over to The Ultimate Brown Paper Flooring Guide . This guide is very detailed and can help you decide if you want to take the leap and install these unique but awesome floors.
Why Paper Bag Flooring?
I decided I could not stand the dirty carpet in my playroom any longer. We create and play so much in this room it was really just pointless to try to keep it clean. It just wasn’t going to happen. But what type of flooring could I install that would be durable, inexpensive but still look nice. I thought about painting the floors like mom painted her porch. I love the look but I just couldn’t decide on a pattern that would work for my huge room.
I decided to search for other options. Pinterest was a huge help and that is where I found the awesome tutorial above. I felt like the paper bag flooring would look sophisticated even for the super low cost. I also went int with the expectation that these floors would not be flawless or perfect.
If you go in to this knowing that the floors will be imperfect and that this is a lot of tedious messy work then you will be happy with your floors.
So let’s get started.
Prep Work
Now that you have removed all your carpet or existing flooring you are almost ready to start your floors but first a few simple steps.
Sweep, Vacuum and Sweep some more. Get all the dirt and debris off of your floors.
Patch any gaps in your floors with DAP Flooring Patch. But make sure you remove all extra DAP by scraping it off. You don’t want to have to sand and this stuff does not shrink.
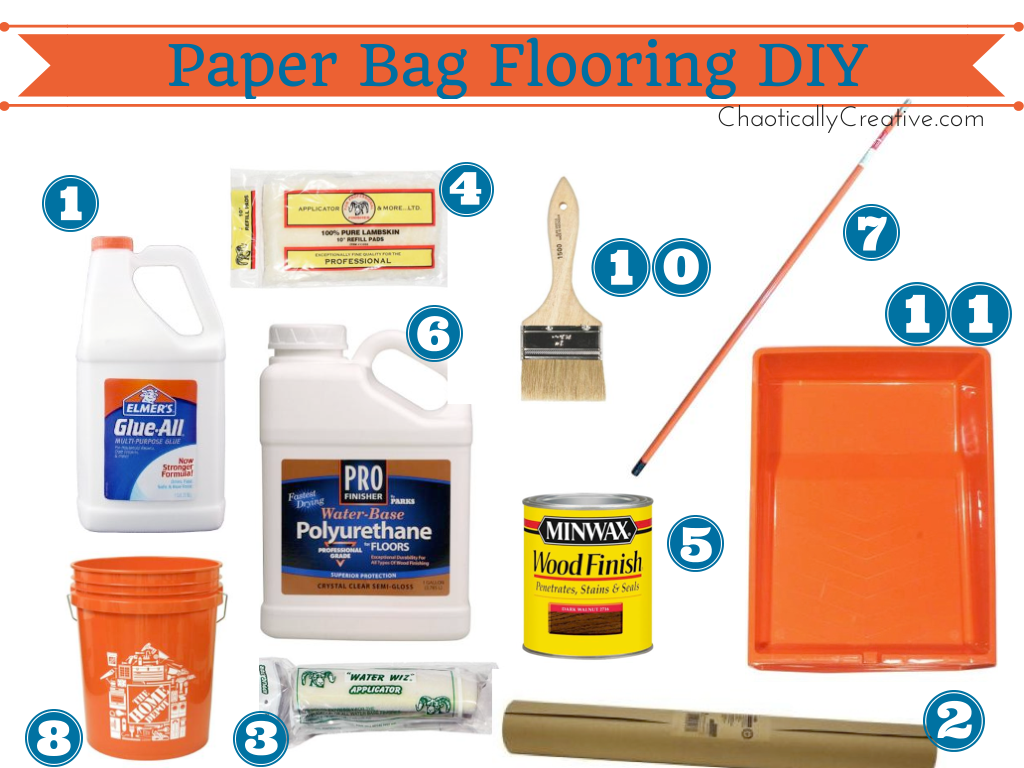
Items Needed for Paper Bag Flooring
- Elmer’s Glue-All Multi-Purpose Glue, 1 Gallon, White (E1326)
- Builder’s Paper
- Lamb’s Wool Block and Pad
- Extra Lambs wool Pad
- Stain
- Sealer
- Extension pole
- Bucket
- Water
- 3 inch chip brush
- roller tray
For this room which is about 600 sq feet the cost was $200 I had to buy two gallons of glue, this also includes buying adhesive and quarter round to finish off the baseboards.
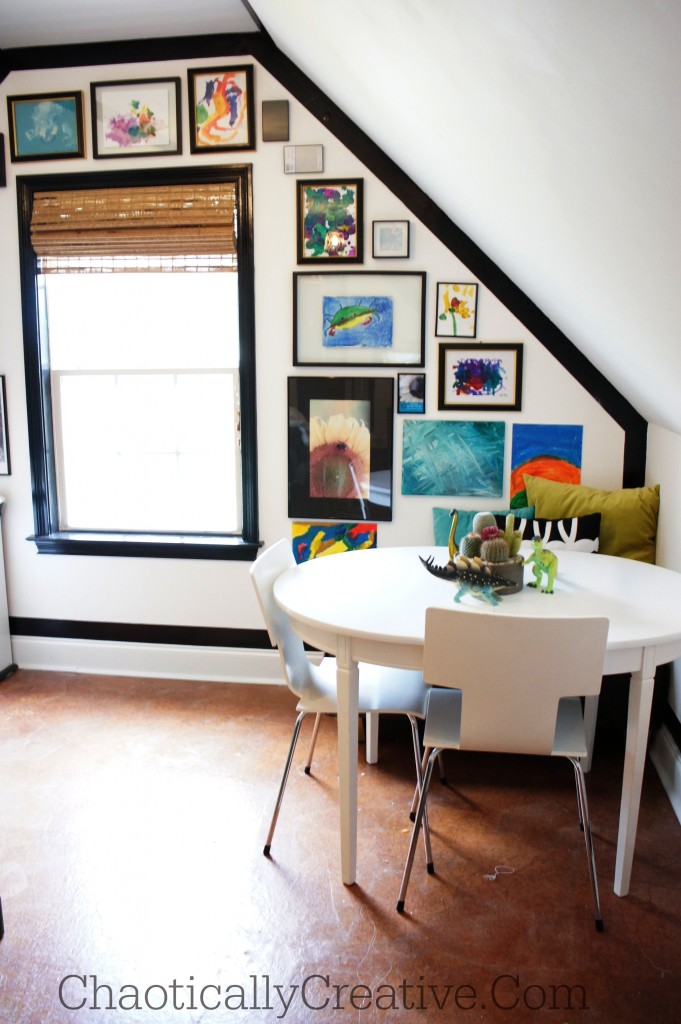
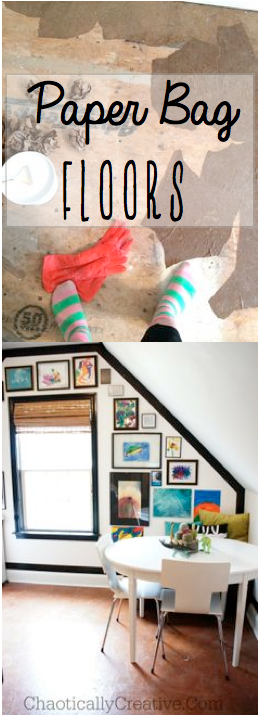
Take a Look at a few pictures followed by a quick step by step installation guide.
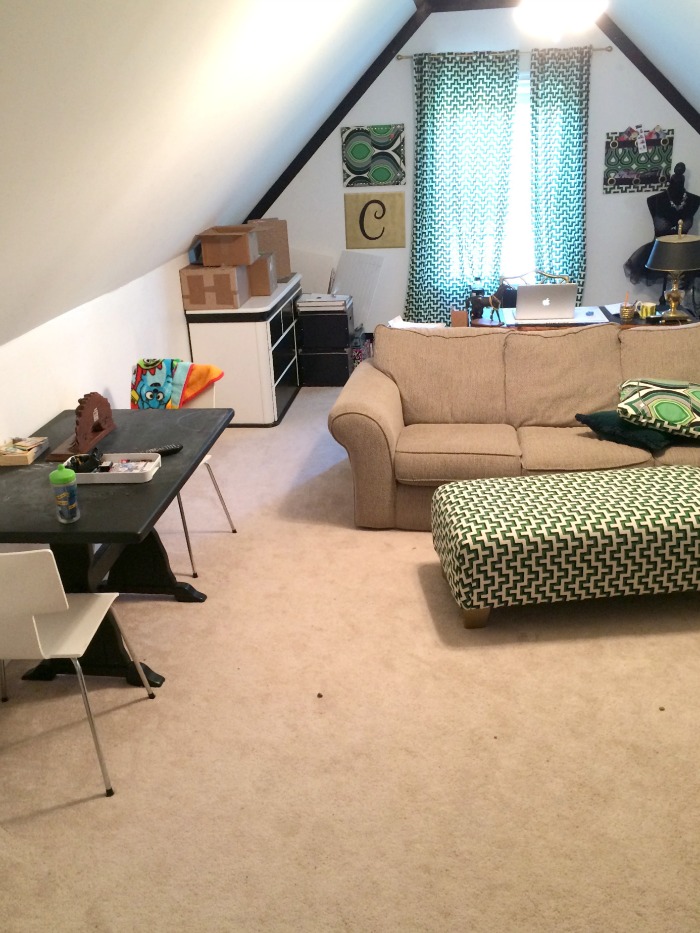
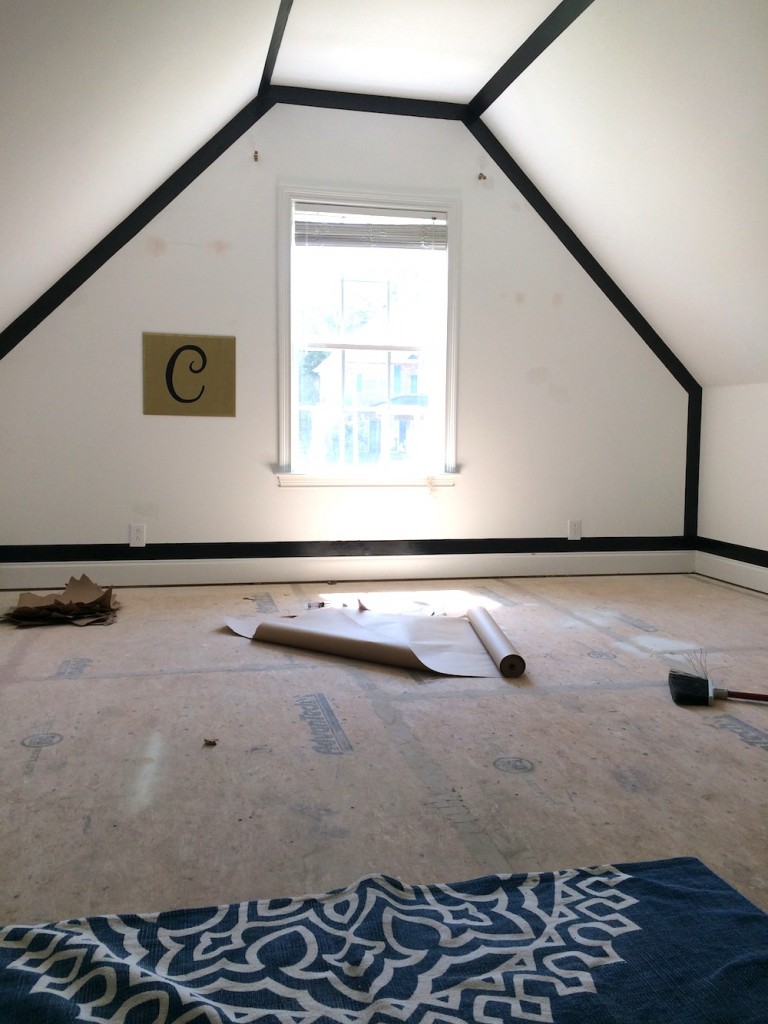
Before:
Prep work completed for Paper Bag Flooring
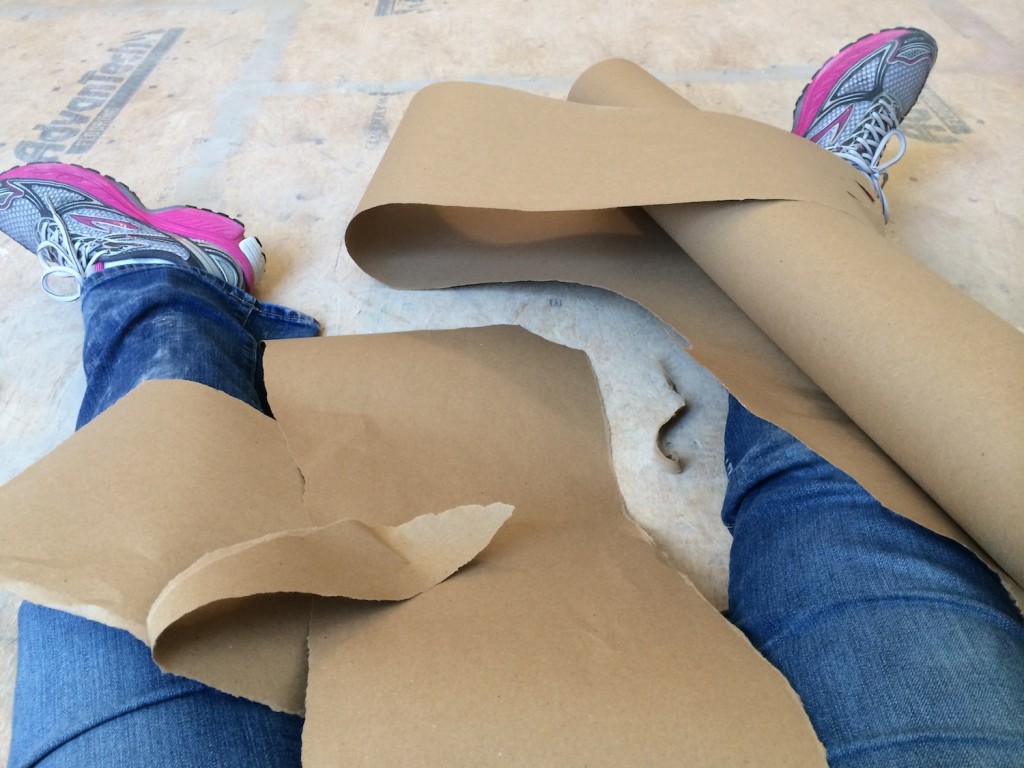
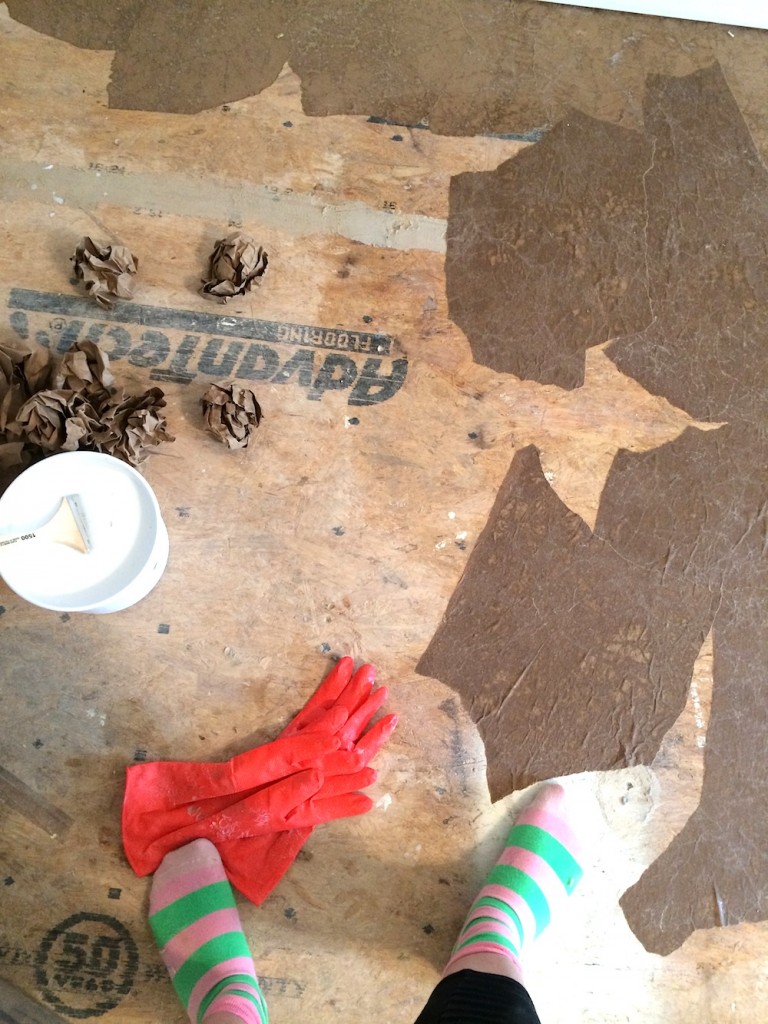
Balled up Paper
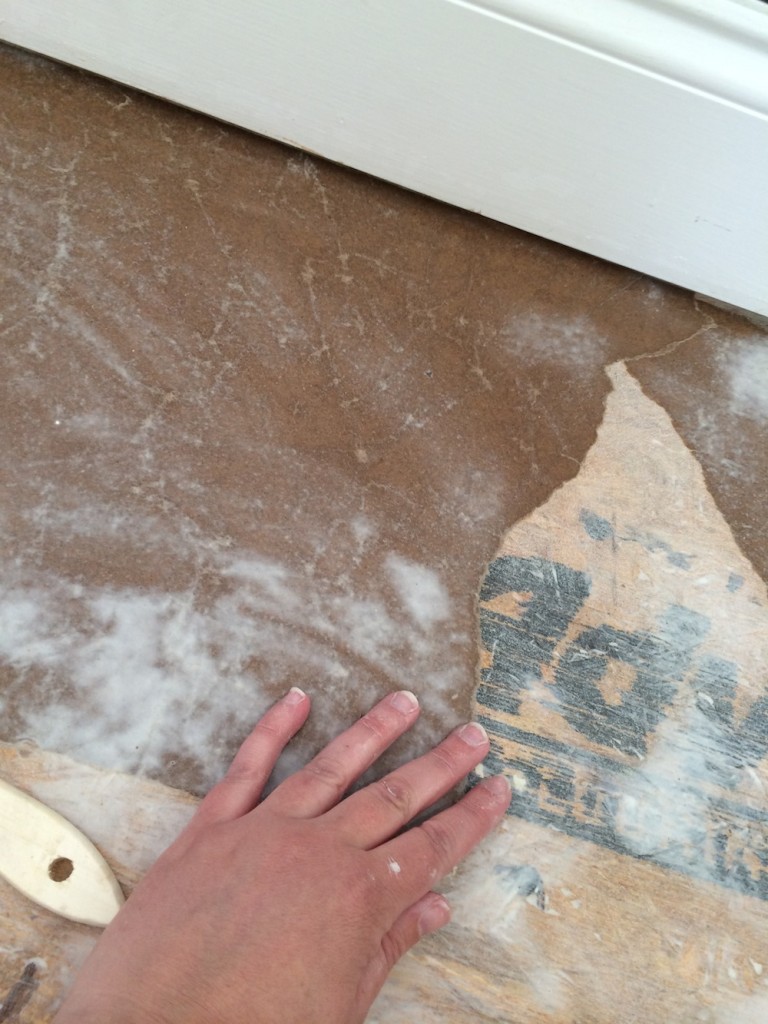
Spreading Glue on Floor and Laying Paper soaked in Glue
Steps for Installing a Paper Bag Floor
- Prep
- Rip lots of paper in large stone like shapes
- Crunch paper in to balls
- Mix 3 to 1 water to glue mixture (3 parts water to 1 part glue0
- Using Chip Brush spread mixture on a small section of subfloor
- Dip paper ball in to mixture
- Spread Paper ball out on top of wet section of floor
- Repeat about a million and one times
- Let Room Dry Over Night
- Fix any paper that did not adhere (this will probably happen please don’t cry)
Finishing Paper Bag Flooring
You have two options you can leave the floor as is and apply your sealer with your lambswool application and extension pole or you can stain the floor then seal.
- Stain Floor edges and corners using chip brush for application
- Using rolling pan, extension pole and lambswool applicator stain the rest of the floor
- Let Dry
- Switch to a new lambswool applicator
- Pour sealer in to new pan
- Apply sealer to the entire Floor working your way out of the room.
- Let Dry 24 hours
- If you have a gap between your baseboards and flooring you will have to buy quarter round. I used a strong adhesive to attach the quarter round to the floor and molding. I also had to buy a saw and mitre box. These materials added extra to the final cost. However if you do not have this issue your floors will be under $200.
Notes
I do believe that the paper has two sides. Don’t ask me which is which because I have no idea. After finishing the room I had a huge section that didn’t adhere and that looked weird. After reading the ultimate guide of paper bag flooring as mentioned above that was the only solution I could come to.
There are still areas where you can see bumps, nail heads and imperfections. I’m ok with that.
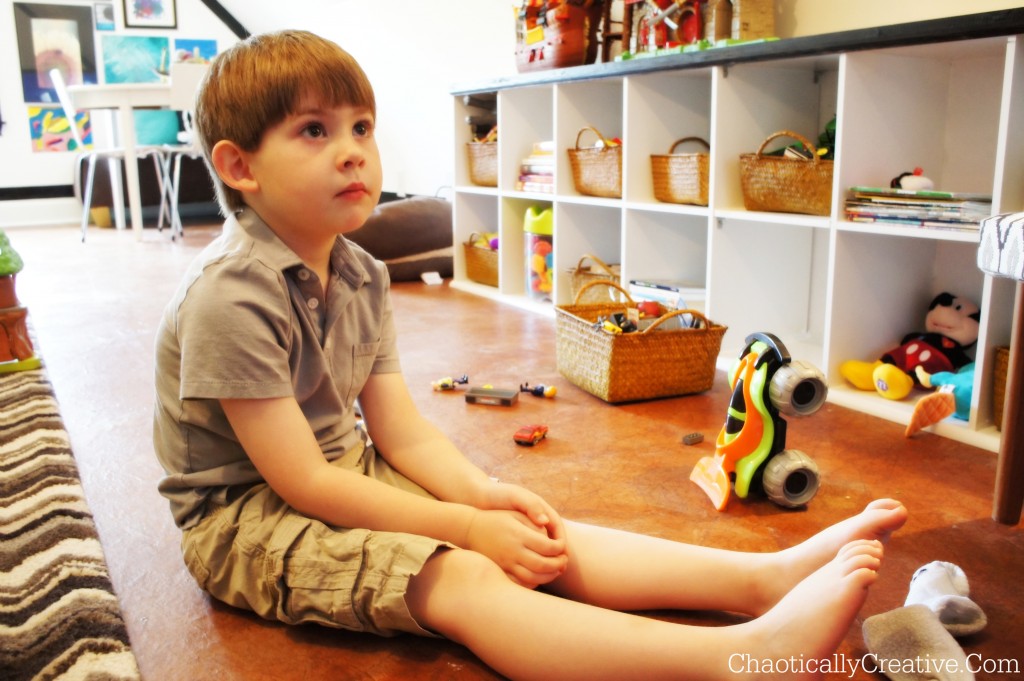
The floors are extremely durable and we are super pleased with them.
I was also able to cover the bottom part of the step that leads in to the playroom. The top part of the step is painted black.
I hope you enjoy the after as much as I do. And if you do come check out our Trash Can lights and our Literacy Center.
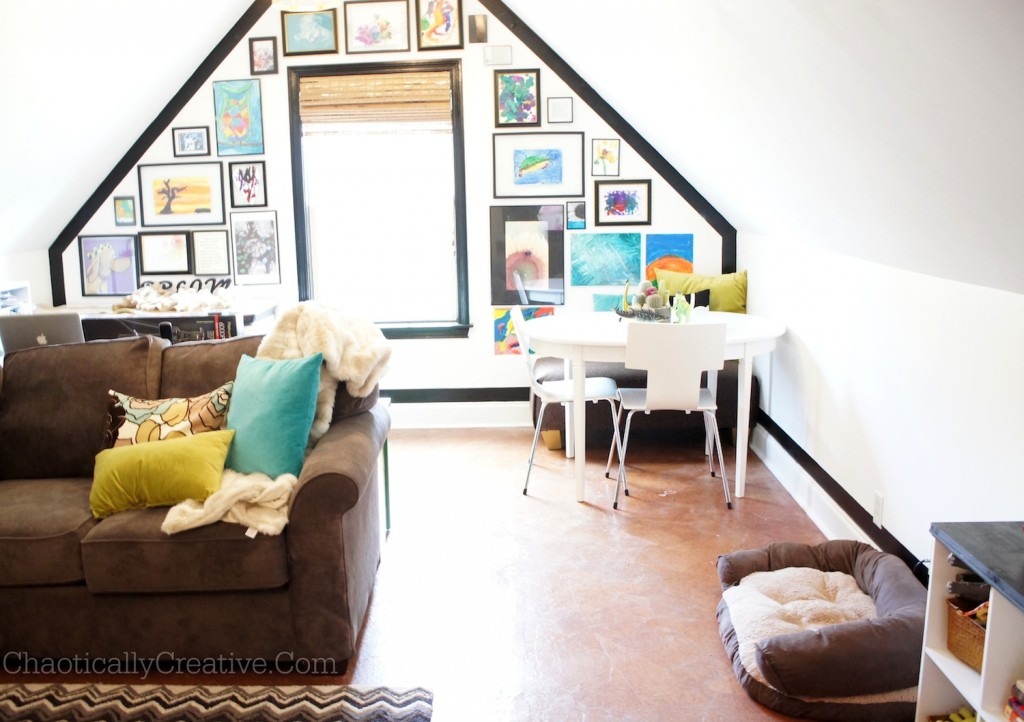 The best part of this whole project was that my husband was super impressed by the look of these floors. They are absolutely sophisticated, manly, and AWESOME!!!
What questions do you have?
Like It.. Please feel free to Pin it!
Do you think it would work on concrete?
On the guide I referenced in the article I remember reading that it does but there is a different water to glue ratio. Check out that link in the post it is super detailed.
I have done it on concert in our laundry room and kitchen and living room and hallway. I started the process in the laundry room. I started gluing the paper down, it didn’t work, tried oil based poly that didn’t work. ended up spreading water based poly first on the floor, let it dry and then poly the paper on to the dried poly. It worked great all the way though into the kitchen. The living room I did a few months later in October and it would stick, so we ended up using the glue and water ratio. I went on to stain the living room floor and polyed over that with water based poly I am still trying to figure out how to get the milky look when I wash or weather changes on that floor. The other floors are gorgeous!!
i would love to do this to my floors which are cement. i live in Vegas and putting hardwood is not recommended because of extreme temp changes. so i wonder if i used the paper bag on cement, would i have to do anything different….hmmm
do u have a picture of your floors you can share?
if you have concrete floors you could probably stain them with the concrete acid stain—looks much like these but SO low maintenance and nearly indestructible. Did ours 10 years ago and even with kids and big dogs they still look amazing.
I absolutely love stained concrete but have no concrete in my house. Lisa you are so right staining concrete is such a good option and looks very similar to paper bag floors.
Wow does that look awesome!! I wish I had a room to try this in.
Thanks Gloria. Yes this was the perfect room it’s a fun room so it fits in perfectly.
This LOOKS FANTASTIC . . . but . . . do you think it will wear well over time, with daily use? Glad you shared this. I’ll be checking out the link about concrete too, as that’s what we have?
Thanks, and wishes to all for a safe,fun Memorial Day Weekend.
I think that it will hold up pretty well. I saw one post where someone had scratched them up really badly and the just did another coat of poly and they were fine. The great thing is it super easy to go back and patch areas. With tile or wood you would either remove the piece with this you can just go in and repair using the same process. So far I’ve moved the furniture tons, the dog has been all over them and not even a scratch. For the price … totally worth it! Thanks for stopping by!
I am so impressed with this project of yours.
Well done!
Thanks so much Carmody!
This is such a fun and inexpensive idea for covering floors! I love how it turned out and how neutral it is. Would love for you to share at Fridays Unfolded!
Alison
Nancherrow
THank YOu!
So awesome! Would this technique work on concrete basement floors?
Bryn I have read that it works on concrete. Refer to the link I have in the post “the ultimate guide to paper bag flooring” she has tested lots of different methods.
Wow, that is amazing! I would have never guessed in a million years that your floors was made from paper bags! How cool. I’d love for you to share at our link party going on now, if you’ve not yet! http://www.delineateyourdwelling.com/2014/05/link-it-or-lump-it-party-number-39.html
I have had this type of floor for 10 years +. It has worn well. To make it last even better use a marine polyurethane. We are selling our home, so I am patching mine now and redoing the poly. Was the best investment I have made in my home. I have had people ask me if it is a leather floor. Always gets rave reviews. I also stained in different patterns to get a variation and I love the look. I used grocery bags for mine and made sure each edge was torn very well with feathering. So glad to see other’s enjoy this. I did a 12×24′ room for $!00.00.
I love that it has held up so long and I am so glad that the patching process was easy for you as well. There are so many techniques for staining that could be used. I’ve even seen someone do a checkerboard and a border. Thanks so much for stopping by!
Just wanted to let you know that you’re being featured on Fridays Unfolded this week!
Alison
Nancherrow
Thanks so much Alison! We really appreciate it!
Hi, Would the process be a little different if laying the paper onto concrete?
Thanks
Angela
How do you clean it ?
Swiffer and a damp cloth
I did my kitchen floor in our farmhouse over 10 years ago with feed sacks of every kind…chicken, goats, cow, rabbit, etc. I collected most of the free bags out of the back of pickups on Sunday mornings after church! There were pics of many different animals on my floors which my grand kids loved. I used basically the same method for applying the bags, but I plugged in my hair dryer and as I scooted along on the floor I dried each area as I went. I also used straight edges of each bag along the wall edges so it was butted right up to the edge. I used about 8 coats of Verithane high gloss to finish mine and was it awesome! My floors were the talk of our little town. A friend did hers with labels from cans and sugar/flour sacks, etc. another friend papered her old cabinets with the brown bags. So little cost with this project. I recently had my kitchen remodeled from top to bottom and covered up my lovely floors with a wood plank ceramic tile. I think of someone years from now pulling up these floors and finding the old feed sacks! They’ll think one crazy lady lived here!
Nancy, we would love to see a picture of your floor! It sound so interesting!
A friend of mine did the same thing using news paper. It was very durable, easy and fun to sit on/at.
I LIKE TO DO A BACKSPLASH, I HAVE 2 LIL BOTTLES OF SCHOOL GLUE , I DONT KNOW HOW MUCH WATER TO USE WITH IT
I would at least get enough glue so that it would measure out to be 1 cup of glue to 3 cups of water. You need atleast that much so that you can dip the paper balls in to the solution.
How would you do this over vinyl flooring? Anxious to give it a try, but really didn’t want to take the linoleum up. Appreciate your help, thanks!!
Betty I have no idea I think it would work if it does on concrete but I would really recommend do a test run.
I did this with white tissue paper on the walls to get a Tuscany look….and painted over it….it did the job and so much easier to do….if you want more crinkles just leave the paper thicker.
I am wondering can you do part of a room and then do the other side after? Rather than emptying the whole room out.
Yes you absolutely could. The great thing about this process is that it’s very forgiving. My stain is uneven in spots so I will be re-staining and then re-sealing. I think re-moving the furniture would be the best option but I know its not always feasible.
I’m in the process of redoing my dining room, from floor to ceiling, and am anxious to try this flooring. It looks so rich. I think my husband thinks I’m crazy, but I bet he’ll be pleasantly surprised.
My husband thought I was literally insane but once I finished he has actually bragged about it … numerous times. You won’t be sorry and he’ll love it too!
Love seeing yet another blogger do the brown paper floor technique! Yours turned out awesome. 🙂
So glad you are happy with your floors – our first brown paper floors were done in an attic room just like yours, so it brings back happy memories. 🙂
Thanks so much for sharing. We get questions about it and this is a great reference because I do not have a lot of the answers! Thanks so much!
I loved doing this to my hallway and 2 bedrooms. It’s been 2 years now and only thing I need to do is apply a fresh coat of poly. I didn’t stain mine, and like to look. In the bedroom I didn’t tear the paper into pieces, just rolled it out the length of the room and glued it down. Really a neat look and I have one more bedroom to take the carpet up and lay down the paper. No more carpet for me!!
Awesome! I love the look of it un-stained as well. It’s so great how you can have so many options on how you want to put it down. You can cut it in to planks, tiles, or roll it out like you said. The possibilities are endless!
Wow. Just found this on Pinterest. I want to redo our bathroom floors but I am scared to rip up the vinyl that is down. Ahh. I’m wondering about going to Joanne’s and getting cute scrapbook paper pages in same neutral color pallet but that have different designs on them and using those for some interest. Thoughts? Or what about even fabric scrap pieces???
I am not sure about doing this in a place where a lot of water is dripped etc. I really don’t know. If I were you I would research paper bag floors in bathrooms. So sorry I’m no help on this one.
Can one use newspapers too for this? If yes, would you need to apply more than one layer of the newspaper since it is ‘ thinner’? Furthermore, would it look better stained or left natural?
I’m really not sure about using newspaper. I feel like it would end up not being very durable because it is so thin. Even if you add layers I am really not confident it will last. You can always test it in a small area or on a piece of plywood first.
Thanks for finally writing about > Paper Bag Flooring – Chaotically Creative < Loved it!
Hi Gals. Now that a few months and wear have occurred, I’m VERY curious to know how your floor is holding up. I so need a cost effective treatment like this in two of my primary rooms.
Thanks.
Cheryl, They are holding up amazingly well. We have spilled drinks, scraped chairs across them, vacuumed them and pets have been on them. They are still my favorite DIY to this day!
I have also seen this done on the walls but never on a floor! On a wall it looks like leather but your floors look amazing! Thank you so much for sharing! Cant wait to try it out!