I am so super excited to share my garage with all you Chaotic readers but first I have to say that the post as of now is a two parter. There are two reasons for that. One it was getting super long, two I wanted to keep you in suspense (j/k) and three my husband got a father’s gift that will be feature in the second half of the reveal post. I hope you enjoy this post and get some ideas and inspiration.
Ever heard the saying “You don’t know what you’ve got “til it’s gone” I know Joni Mitchell sang it but I’m sure it’s roots go back even further than her. Well that’s kind-of how I feel about my garage except I didn’t know what I had ’till I had it. Let me explain. If you’ve been following along I told you all that this is our family’s first house. You can check it out on Lesley’s house tour. We have lived in other homes but never a house including our last home which was a 3rd level condo. Sadly, there was no garage. Just 3 flights of steep, treacherous, horrible stairs. The stairs were all fine and dandy until I had Jude and had to figure out how to get his 9lb 10oz of sweetness plus his car seat, diaper bag and all the groceries, etc. Let’s not even get into when it rained.
Well, you get the point. So when I got to go house hunting you better believe I was in heaven. Let’s just say I have the ultimate respect for my garage. And now you know why. Here’s a peak inside my little slice of garage heaven. I hope you enjoy it and get inspired…
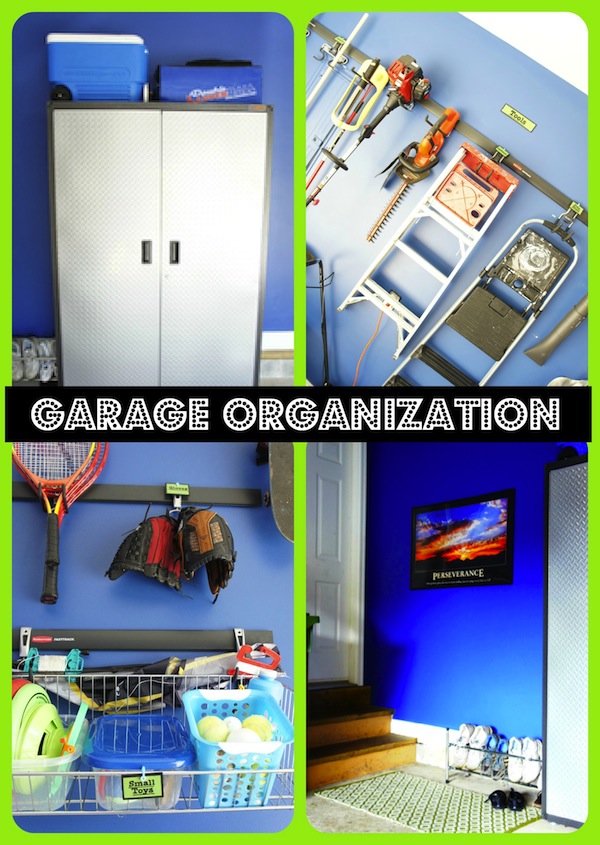
Our garage is where we enter and exit our home as a family. I figured why not make it feel like a room. We painted it my husband’s favorite sports team color “Duke Blue Devils” blue.
This room serves many purposes mainly storage but secondly it will be a workout space for my husband so we would like it to feel like a room.
We added two motivation posters from his old office for color and motivation because he will be using this space for his exercise equipment.
A colorful rug from TJMax for $19.99 is a nice place to sit and take off our yard shoes which we then place on our shoe rack purchased at Lowes. This is not the only place we store shoes we also have a shoe bucket in our house. For more organization ideas visit our Organization page.
In the future we plan to Epoxy the concrete floors to create an easy to clean flooring and to cover up all of the paint and oil stains.
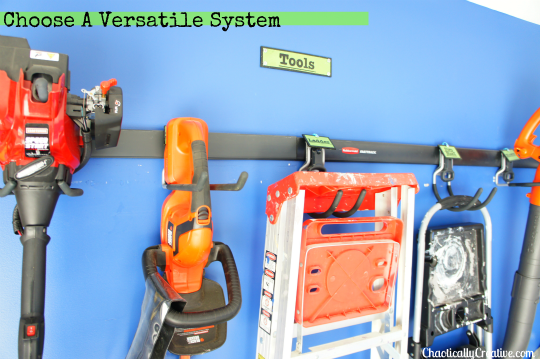
There are many wall systems out on the market that can be used to organize your tools and sporting equipment. My husband and I discovered the FastTrack by Rubermaid and were very pleased. We purchased one rail kit to hang some of our equipment and it worked fantastic. In fact it organized our things so well that when I left my garage opened during a project, someone with sticky fingers walked right in and took my blower from my FastTrack. One week before, they never would have found it in the big mess of a garage we had. Needless to say, even though our blower was stolen we still decided to purchase more FastTracks and use the system throughout the garage. The FastTrack has so many options and attachments that allow you to be able to create the type of storage system that is right for your family’s needs. We have really enjoyed the system and have gotten many compliments from neighbors and kids (now that’s amazing!)
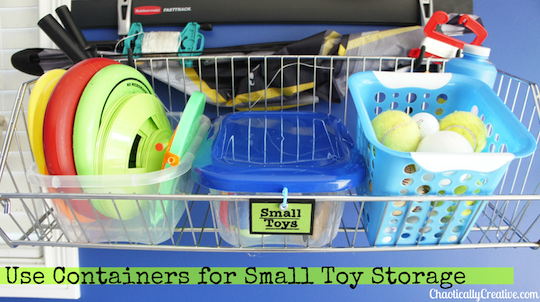
I found out it’s a good idea to keep a few baskets for small toys readily available for the kids. My kids can now reach these toys and they know exactly where they go when it is time to clean up.
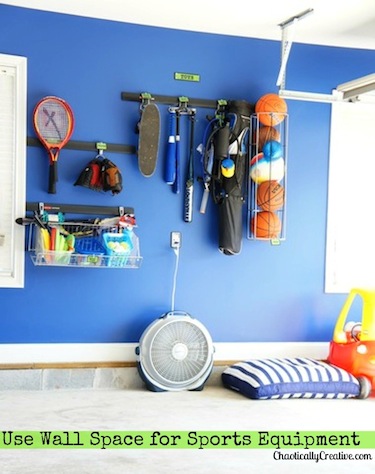
Take full advantage of your wall space. Sports equipment like balls, bats, gloves and more can all be incorporated into a wall storage system. The more floor space you free up, the more you can do in your garage. Maybe you don’t want to have a work-out space but a craft area or wood working zone. Remember, Utilize the walls, go vertical.
Don’t you just hate it when you need the power drill and the battery is dead? Not anymore. Here is our charging station. I took a left over board from a project, painted it white, and mounted to shelf brackets to it and now I have a shelf. Nothing fancy but perfect for it’s purpose. Besides using it for a charging station we also can place a monitor there. It is also located right next to the door so when I have a drink in my hands and I’m trying to unlock the door I can put my drink on the shelf instead of the concrete floor down below.
If you have large items that do not fit on your wall systems think about using large hooks. Use ropes and wrap them around the objects and then hang the objects from the hook for easy access.
Teach kids where to park their riding toys and keep them there. Believe it or not kids like to be in an organized environment. Help them remember how to keep areas safe and clean.
Thanks for stopping by. This was only half of the story. There is much more to come.We are going to talk; zones, labels, details, pets and much more on Garage Organization Part 2. So stay tuned.
What other things have you done in your garage to keep tidy and organized? Please feel free to share.
For More tips on Organizing your Garage Check Out:
Garage Organization Part 2


Love it. My garage depresses me everytime I open the doors!! Thanks for the inspiration!
Thanks Rachel. Mine did too. Now that we organized it and painted it, it’s so functional for everyone. Come back and see part 2 later this week.
Your garage really is awesome. Thanks so much for sharing!
Mary
Thanks so much for checking it out! I love your site! I’m sharing it on facebook.
Well, I think that is a great idea. I’m going to share your site too. 🙂
Hello! I’m a friend of Jennifer Page’s and have been following your blog ever since you redid her playroom! 🙂
I’m actually a professional organizer, trying to get my business jump-started here in Alabama. Would you mind offering a little technical advice? I love the pictures in this post, especially the top one with the collage. How did you make it so large and how are you adding text to the pictures? Any advice you could offer would be greatly appreciated. Right now, I just use InstaCollage on my iphone for my “before & after” pictures, but I have a feeling there are better options out there. Thank you!!!
Emily I sent you an email. The best tools are http://www.canva.com and http://www.picmonkey.com