So here it is finally. This time I could have DIED for DIY, literally. If you are looking for a lovely post of how a cute little laundry room came together flawlessly, then STOP reading NOW. If you want the real deal which will be sure to give you a few laughs and may even save your life one day or at least a bruise or two then keep on reading. And in case you haven’t figured it out, this ain’t your ordinary room reveal. It’s the story about the room that almost killed me, Lucky I Lived: Laundry Room Reveal
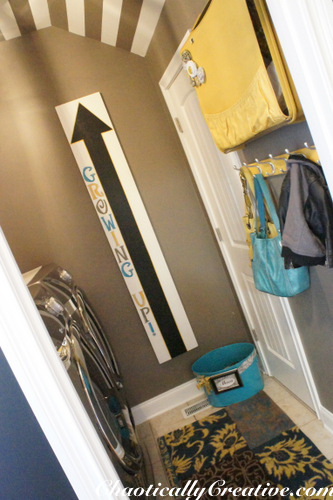 It all started after we closed on the house. We were still living in the hotel and I knew I had to get into the Laundry room and paint it before my mammoth washer and dryer were delivered because I would never be able to move them to paint.
I took my 2 year old to the paint store and randomly picked out 3 shades of Benjamin Moore grey and placed them on the counter. As my son sprinted across the store, I yelled out to the guy at the counter, “Please pick one out for me.” He quietly whispered …”Sparrow.” I shouted “Sounds Good!” and went with it. I stayed up all night painting this little room as my family was tucked in safe and sound at the local hotel. The paint turned out gorgeous!
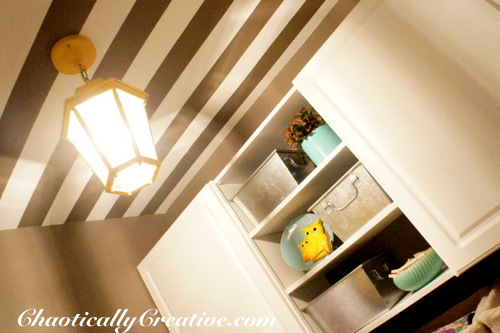
A few months later I hatched a plan to paint the ceiling. Boy is it hard to paint stripes on a slanted ceiling, on top of a washer and dryer, in a really small room. It took a really, really, really long time. What a pain in the neck!
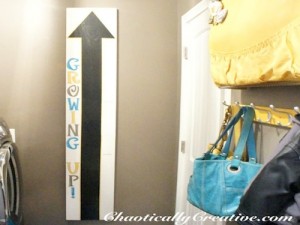
Also in this picture is the Growth Chart I made for the kids. It is so much cuter in person. I’m not gonna lie! It’s adorable.
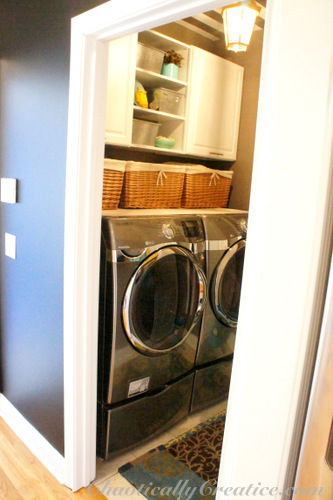
 Here’s the best picture of the yellow lantern I painted. Yes, best picture. I know. The laundry room is located in the back corner of my house where there are no windows.
This lantern was one of the projects that nearly killed me. I wired it, rewired it, took it down, put it up, prayed about it, almost punted it out of the back door and cried about it… you get the point. Every time I wired it, I would take cover, flip the switch and it would pop and trip the fuse in the box. My husband and I finally figured out why. Light fixtures that are not flush mounts (in other words chandeliers or fixtures with chains) often have extensions tied into the black and white wires. The extension wires in this light fixture were tied together and the black and white wires were tied together. Therefore there was no connection to the light. So if you ever have this problem make sure that your extension wires are properly tied in with your black and white wires.
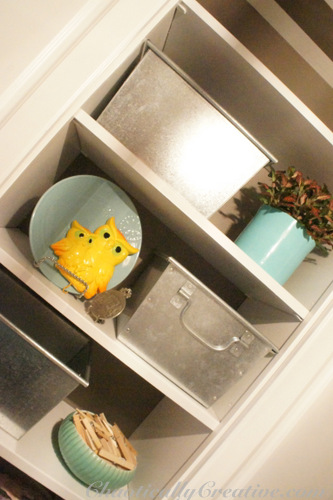
These accessories are a mix of new, old, and sentimental. The bins are from several years ago, I purchased them at Ikea. The plate, owl, and bowl are all Thrift store finds. The owl dates back to the early 1970’s. I picked up a low light plant since there is no sunlight in this room and it came in a cute little turquoise planter. The small silver crest is a going away gift that my employer gave me when I left Germany, the last year I was a teacher assistant.
Years ago it would have been really hard for me to put these pieces on the same shelf because all of the blue/greens were not the exact same shade, but now I think differently. They really look more interesting this way. When you see them in person they compliment each other. I am less afraid of color and willing to go outside the box. Luckily decorating the shelves was very easy but installing them was a different story.
I purchased these laminate cabinets at Lowes Hardware in the Pre-Fab section. It seemed easy enough to install. I had a stud finder at home. But it seemed that the only stud it was accurate at finding in my house was my husband. Otherwise no luck. I thought that I had my cabinet secured in all of the studs and when I went to put that last and final screw in, the cabinet it came crashing down and hit me square in the knee. You would think I would’ve given up. I stayed up for hours with a huge lump on my knee. I kept saying “if they could build Rome, if they could build the pyramids, I can do this” Well, a few injuries later and a huge dent in my nice washer, my beautiful cabinets were securely installed and correctly at that. Now don’t ask how many holes are behind the cabinets, that’s my little secret.
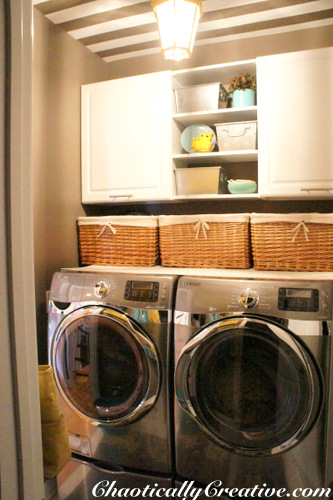
 After installing the cabinets I measured the space in between and had Lowes cut some MDF boards for the shelving. I drilled holes and used plastic shelf clips to secure the shelves. All in all the project was about $300. I installed handles horizontally because the cabinets are high and they are easier to reach. I also think it gives these traditional cabinets a modern twist.
Lastly, I bought the worst type of plastic material known to man for the top of the washer and dryer to cover up the scratches and huge dent I made. I know longer have an SUV so I had to get creative because I was getting impatient. I had to buy a material that I could fit in my Camry. Oh boy, if ya’ll could have seen the guy at Lowes and me trying to get it in my car you would have died. Needless to say, we got it into the trunk and I got it home. But before I got too excited, I realized that I had scratches all over my car from trying to get the sheet into the car. My nine year old promptly noticed them and stated “Oh, what happened to your car, Daddy’s gonna be mad.” No big deal though. Nothing a little magic eraser wouldn’t fix. Crisis averted. So I got the material out of the trunk, which by the way was like 8 feet long and then I found out what I actually bought was the most indestructible material on earth. The material is called FRP. It has fiberglass in it and you actually need a special drill to cut it. I had asked for an all purpose cutting tool at the store and the tool the employee suggested was for cutting cardboard and plastic packages. This poor little tool stood no chance against the FRP. Thank goodness for the internet though. Through a web search I found out you can use tin snips to cut it. I did discover unfortunately it makes you itch and it’s so hard to cut. But because I rather suffer than give up, I cut it and now I at least have a protective cover on the top of the washer and dryer. (Warning: Wear gloves and long Sleeves)
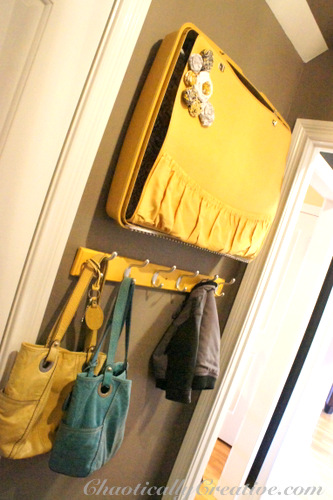
Now to the piece de resistance! I love this vintage Samsonite Suitcase turned Storage. I painted the coat hanger and the lantern all the same color yellow to coordinate with this piece. I think it is quirky and fun.
I also have removed the door completely from this room. If I hadn’t the door would be blocking this wall. Facing this wall is the washer so every time I got something out of the washer I bumped into the door. I frequently remove doors if they are in a room where they are causing a hindrance.
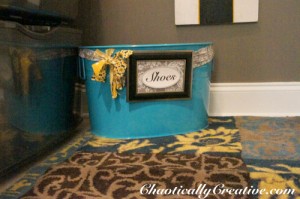
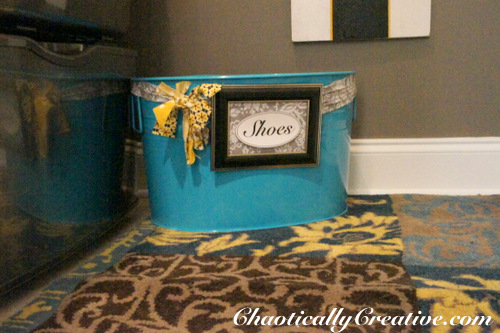 I found this super cute rug with the perfect colors in it at Home Goods for about $50. It’s more than I would normally pay but, I have searched and searched and when it’s perfect for a space I splurge sometimes. The kids are able to sit on it and take their shoes out of the shoe bucket and put them on.
A peak inside my cabinets, nothing much in there yet. I have baskets on top of the washer and dryer for storage as well. My washer and dryer also have drawers that provide storage space. Update! You can now see what’s in these cabinets here in my Diaper Box Storage Bins post
Tornado Closet
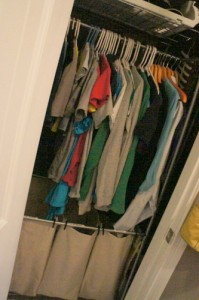
Are you wondering where I hang clothes or where dirty clothes are placed. This is not a large room but on the opposite side of the washer and dryer is our Tornado Closet. We call it that because it is where we go in case of a tornado and last week my makeover had to stop. We had to prepare for an actual tornado, so I stock piled this room with pillows and all the other necessities. Luckily, we did not have to use the tornado closet, but we prepared. The middle picture above is the closet. The picture to the left is a rolling unit that you hang clothes on. Underneath the clothes are three compartments for dirty clothes. In the picture on the far right you can see it fits perfectly into the closet and that is where I hang my clean clothes and sort the dirty ones. My brooms and mops hang to the side. In case of an emergency we roll out the unit. Even the smallest spaces can be functional.
I know this room reveal was a little unconventional. I told you my life is Chaotic, but I wouldn’t have it any other way.
And by the way you got a little sneak peak at the next room reveal. If you looked closely the hallway has a fresh new coat of Chalkboard paint and I have two new accessories I purchased from my Gift certificate I won at for the room I designed for Poshtots on Olioboard .
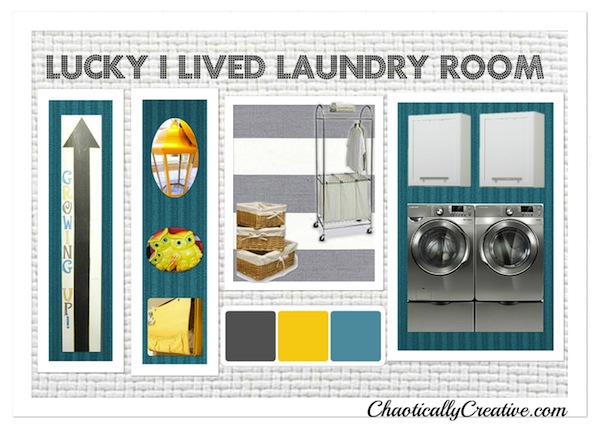
Mood Board & Source List
-
- Coat rack by Target in white then painted yellow by Chaotically Creative
- Purses by Fossil
- Jacket by Baby Gap
- Suitcase Storage by Chaotically Creative
- Rug by HomeGoods
- Shoe bucket by Martha Stewart @ Kmart
- Cabinets by Lowes Hardware
- Baskets by Michaels Craft Store
- White and Blue storage containers by Dollar Tree
- Metal Bins by Ikea
- Small accessories from local thrift store
- Rolling Laundry Organizer hanging Rack from Lowes Hardware
- Samsung Washer and Dryer Sears
- Nickel Plated Cabinet Hardware From Lowes Hardware
- Lantern From Habitat Restore and painted by Chaotically Creative
- Growing Up Growth Chart by Chaotically Creative
Paint Color
Sparrow by Benjamin Moore
DIY



Your laundry room is awesome! I love the stripes on the ceiling. How clever!!
Thanks so much Carolyn! As hard as the stripes were to paint I love them and I would do it again. I hope you follow along. Thanks for stopping by!
WOw – what a great transformation. I love that striped ceiling. And the suitcase storage is so clever. Great job! I featured it on my TT&J FB page 🙂
xoxoxo
Thanks Jennifer I’ll head over and check it out! I love your site and have been following along. Your entry way is awesome by the way!
Absolutely adorable! I love your creativity. What a cool suit case and the angled ceiling with the stripes! Neat.
I did my laundry room recently too with an arrow sign only my sign goes down! You can peek at it here. http://jessiegunderson.com/?p=2930
Great job on yours. It much more organized than mine!
Thanks so much Jessie! I am gonna head over to your site and check it out. Can’t wait to see what you came up with! Thanks for checking Chaotically Creative out!
This sounds exactly how I tend to do things! There are always mess-ups along the way, but the finished project looks great! Congrats. That is a fabulous laundry room!
Jill, It seems every project I do is like this. People may wonder why do you keep doing them then. Here’s why… First there’s no greater accomplishment then doing something yourself and having an amazing finished project and also I gain a wealth of knowledge along the way. I would have never learned about the inner workings of light fixtures if I hadn’t encountered the issues I did. Knowledge is power. Thanks for stopping by!
Love the makeover! I need to my laundry room. Would have to cover the pipes on the walls with something! Love the striped ceiling! One of my first apartments was an older victornian house. One room had alternating wallpaper with medium rose pattern with small rose bud pattern. They carried the rose bud on the ceiling was beautiful!
I would have loved to see that. Isn’t it amazing how design translates throughout time. Painted ceilings have been around forever. We use to live in Europe and they are everywhere! Thanks for stopping by! I hope you keep following.
I love your *new* laundry room!!! Cute accessories. 🙂 Just wanted to let you know that the button you have in your post is actually for posts that I Featured. The actual party button is the one that says “Weekend Bloggy Reading.” 🙂
Thanks Amanda I’ll fix it!
Your laundry room is FANTASTIC! If I could give you a word of advice (please don’t hate me!), your artistic photo taking is kind of distracting from the actual work you did. I think you’ll gain more followers by taking straight-on shots. Again, just a word of advice… take it for what it’s worth!
Thanks so much and Jenna it takes a lot for me to get mad at any one! Thanks for your tips. From start to finish this room was a challenge even the photography. I think if you take a peak at Gavin’s World under my Home Tour you may find it less distracting. Unfortunately, that Laundry room is so tight and dark I was having the hardest time getting any good shots. Thanks again for stopping by.
What a great laundry room. I appreciate the ideas. I think my laundry room is next on my major projects. I only wish I was smart enough to have painted it before we moved it like you did! I’m going to have to move my cabinets when I re-do my room, so hopefully mine won’t crash down.
Thanks again, Karen
Karen, Thanks for the compliment. I am so glad you were able to get some ideas that you can use! Let me know when you re-do your laundry room I want to see it! Lesley
I love the suitcase storage! Your blog is so cute! I’m your latest follower:)
Thanks so much Latoya! I’m so glad you are following!
I love the ceiling! LOVE LOVE LOVE IT!!
Thanks Kim. I’m glad you like it!
Oh my word every last detail is thought through. Oh my goodness it is pure perfection. I love it great job Lesley!
Thanks so much Beckie! I am so glad you liked it! I thought it would be the room that would kill me but I learned so much through the process like always. Thanks for your comment!
Hi Leslie. Thanks for checking out my blog. I’m loving yours. That’s awesome that you’re mom is contributing. You’re right, I do love the 70s owls and you did such a great job on the laundry room. Thanks for including how much sweat and tears went into it. Some bloggers make it look so easy when you know it’s not. BTW, there’s a website called Thing Link. It’s a great way to show your readers where you bought your items. I haven’t tried it yet, but I plan to.
I’ll have to check it out Thing Link. That sounds really neat. I was able to link most of the items purchased with Olioboard on my son’s room but haven’t only played around with it on the Laundry room. I haven’t wanted to invest in design software yet but we’ll see I might bite the bullet and do it. Thanks for your input. I love having my mom contribute she’s very talented!
That is awesome. Starting to feel like a bit of stalker! The stripes on the ceiling are amazing …
🙂
Linda
Stalk away Linda! We love that here.
LOVE the stripes on the ceiling. The little pops of yellow are brilliant, too. Sounds like such a big effort for a tiny room, but judging by the pictures, I’m willing to bet that it was well worth it!
Kirsten, Thanks so much for the compliments. Most of my projects are like that. Part of the reason I titled my blog “Chaotically” Creative. However, I’ve started to realize that I learn so much through the process of decorating and design as well as being able to enjoy the final product as well! Thanks again! Lesley
That striped ceiling is so amazing I’m at a loss for words, and that’s rare… Thanks for linking up to the Repurpose-Remodel-Reveal Transformation party!
Whitney – The Rooster and The Hen
Thanks so much Whitney. I am so glad you liked it. Your party was awesome. I really like the theme specific parties!
Lesley
I love those stripes on the ceiling! I may do something similar, but the laundry room is always one of the last rooms I get around to… And, having just moved into my home, it may be a while! Great job!
Kristy I am so glad you stopped by. I loved your blog by the way. I know the feeling about just moving in, it’s overwhelming. Good luck and I look forward to seeing what you do to your new home. Lesley