
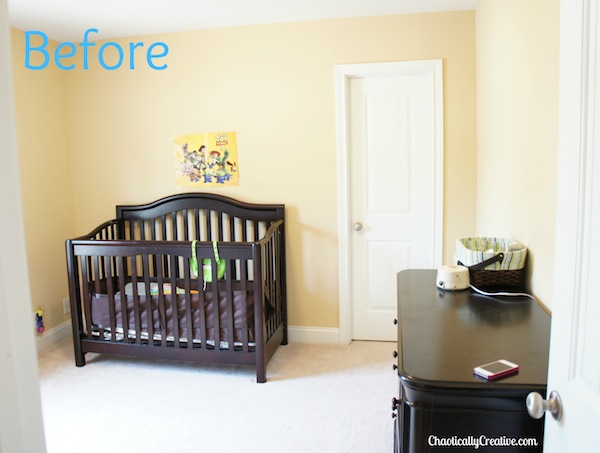
Oh, how I would love to take credit for this awesome idea for Crib to Upholstered Headboard DIY, but I cannot. I found how to Change your Crib for Cheap by Brooke of All Things Thrifty, months ago. I knew Jude would be growing out of his crib soon, so there would be no need for the transformation immediately. So I filed the idea away in my head because I own the exact same crib. I figured I could use the idea for his big boy room. And so I did.
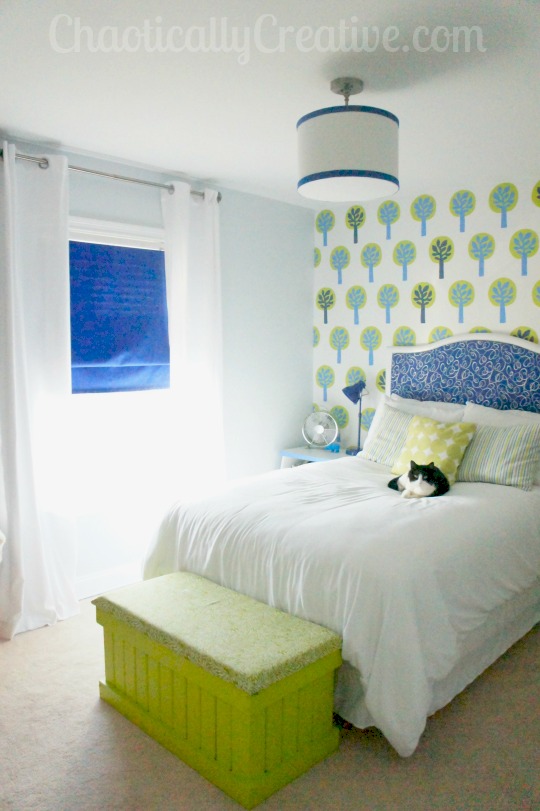
Here is a quick peek at my final result. I suggest, if you want to give it a try, that you read Brooke’s instructions on how to Change your Crib for Cheap and then come back here for some additional tips on how I turned mine into a functional headboard.

As you can see, Brooke and I have the same shaped headboard and you will see in some future pictures it is the same crib. I honestly believe that you can do this same project with other cribs as long as you have enough space to inset a piece of thin wood.
Now that you have read Brooke’s tutorial here’s a list of changes I made…
- the dark wood did not work with Jude’s room therefore I used Zinnser primmer, white paint and a clear coat sealer for a shiny finish
- obviously I left off the buttons and went for a patterned fabric
- I used plywood instead of MDF
- as shown in my previous post Nailhead Trim Upholstered Headboard, I used 4 layers of cotton batting for padding instead of foam and nothing else
- the headboard is mounted to the wall
- 3 and a half yards of fabric were used to cover the board just fyi
So that you can get a visual of the changes I made here are some additional photos and some tips.


You guys know that I like to keep it real. Sometimes too real. Hopefully, you don’t think I’m complaining, but instead you feel like you can learn from my mistakes. One challenge I met during this project was tracing the curve of the frame onto the wood. I could not for the life of me trace it perfectly or get a perfect cut. In the end the piece of wood did not fit into the frame perfectly.
To correct this mistake I used batting and stuffed it around the sides and re-stapled the fabric. Once the board was stuck into the frame you couldn’t even tell. So remember not to trim to much of the extra fabric from the back of the board in case you need to add a little extra padding to make up for some gaps.
After I covered the plywood, I flipped the board over and attached it to the crib slats by drilling pilot holes through the slats and the plywood. I did this going from the back and was careful as to not go through the front or fabric.

After the headboard was all painted and put together I was thrilled to get it upstairs and onto the bed. I couldn’t wait to see how it looked with my custom painted stencils. Knowing how short the crib was and how super tall the mattress and box spring were I knew we were in for an interesting combo. And here you have the vanishing headboard. Cute huh? So what do you do next? Because this very well could happen to you.
And if it does….
Hangman Products HM-18D Heavy-Duty Mirror and Picture Hanger with Walldog Anchorless Screws, Aluminum, 18-Inch

Ok go ahead and pin it to your Awesome and Amazing products board. You won’t regret it, I promise!!!
If I haven’t told you lately, I am so bad at hanging things. I make my walls look like swiss cheese. I hang them unevenly, I mis-mark them, you name it I tend to mess it up. But with this awesome wall hanger I have yet to make a mistake. And the best thing of all, you can hang really heavy objects, like headboards. They also come in smaller and larger versions. I love these bad boys.

In order to have a flat surface to install the french cleat, use a piece of your left over plywood and screw it into the back slats of the crib.

Follow the instructions on the package of the French cleat. Make sure to hang this part straight.

The wall piece has a nifty little level so to insure that you hang it straight. Gosh it makes hanging things so easy.

Ahhh, much better. Now you can see the headboard. And the hangman does it’s job again. I hope you enjoyed this little transformation. We’ve tackled the Customized Wall Stencil and The Crib to Upholstered Headboard project. Soon, I’ll be back again with more updates from Jude’s room including an easy light fixture for cheap and a 5 dollar night stand.
Oh, I almost forgot, my total cost for this project was almost next to nothing. I had everything but the fabric, wood and french cleat. So for this headboard, I paid about $35. Remember to be thrifty. Use coupons for the batting, re-use old paint and shop for discounted fabrics. Good luck and have fun.

I love this. Definitely will use these instructions when I convert Mitchell’s crib. Thanks!
Awesome Rachel. Let me know if you have questions!
This is adorable! I love that you shared a stylish way to re-purpose something that seems to have a short life. Love the print and color.
Thanks Julie, I am glad I didn’t have to buy a new headboard!
What a great look! I love the fabric you chose!
Michaela, Thanks so much for the compliment, Jude is loving his big boy room.
Wow you really rocked this project. I am going to go check out the link you gave credit to, such creative women, I love it.
Thanks so much and definitely check out http://www.allthingsthrifty.com as well.
What a great upcycle and what a cute room! Great job!
Saw this on “serenity Now” blog! 🙂
Thanks so much!
I LOVE a great crib repurpose! super job on the headboard.
gail
Gail, Thanks so much for the compliment I just saw you re-pin this on Pinterest and therefore found your blog, which is awesome!
Lesley–when I followed you on pinterest, I see you’re from n’ville. My daughter lives there. 🙂 Thanks for the kind words about My Repurposed Life.
gail
Awesome, yes we are newly transplanted here, originally from NC. We live outside of Nashville in Murfreesboro and love it here.
My daughter has almost the same crib and I’ve been wanting to do this as well! I pinned this a while ago 🙂 Now that I’m getting close to being able to do this, I’m curious, what size fabric did you get to be able to cover the whole section of plywood?
I used 3 and a half yards Meghan. But I believe it was the 54″ width type. Good luck and send us some pictures or post them on our Facebook page we would love to see your version as well!!
Is this a regular standard sized crib? Can you mention the make and model of the crib?
It’s a convertible style crib like this one http://www.toysrus.com/product/index.jsp?productId=20844206 hope this helps
Love this! A great project for an old crib and I love the fabric you used!
I work with Cassity over at Remodelaholic and we are hosting Headboard Week and a big headboard link party that we’d love to have you come join! You can join the party here — we’re picking our favorites to feature tonight (sorry for the late notice 🙂 — the party will be open for a couple of days even after we pick our favorites!: http://www.remodelaholic.com/2014/06/headboard-week/
Thanks! Have a great day!
Lorene @Remodelaholic
thanks so much I’ll head over and check it out.